
This is an old revision of the document!
Table of Contents
Daily Records - Other Records
Video for the Other Records section
$$
Other Records
All authorized persons can add records to this section. A new record is added using the + Add record button.
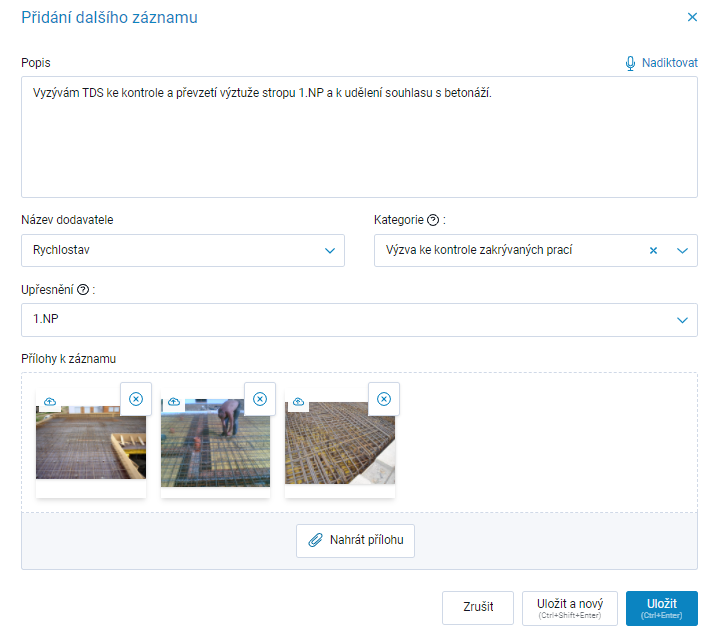
In the Add other record window, you can enter text of any length in the Description field.
The Category field is linked to a reference list that allows records to be divided into groups or filtered.
The Specification field is used to provide a more detailed designation of the record for subsequent filtering.
Attachments of any format can be uploaded to the record. When adding attachments, we recommend adjusting the size and number of attachments to the quality of your internet connection. The larger the files, the more problems may occur when downloading them or uploading a signed report. The size of a single file must not exceed 30 MB.
Please note compressed files such as ZIP, RAR, ARJ, etc. Most free versions of PDF editors do not allow attachments in compressed formats to be downloaded from a PDF file. We therefore do not recommend adding compressed files as attachments. A domain Administrator can disable the uploading of these file types in the Domain Settings.
In the Project Diary Settings, you can enable the Location and Drawing fields. This allows the record to additionally be localized using GPS coordinates on a map and/or on a drawing uploaded in the Project Settings.
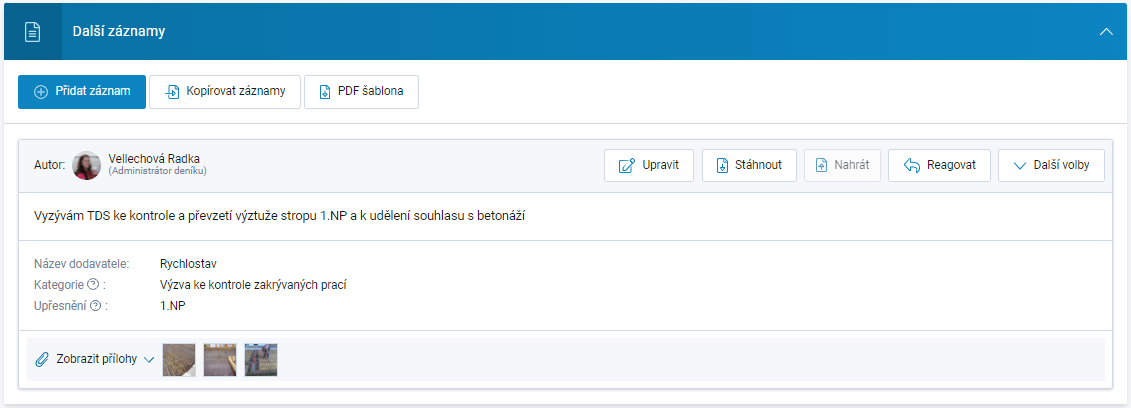
Other Records always display the Author of the record and their role in the diary.
The author should also sign their own records, thereby locking them. If they do not have a signing certificate, a scan of the signed report can be uploaded to lock the record. Details regarding signing Other Records reports are described in a separate section of the documentation.
Additional Record Options
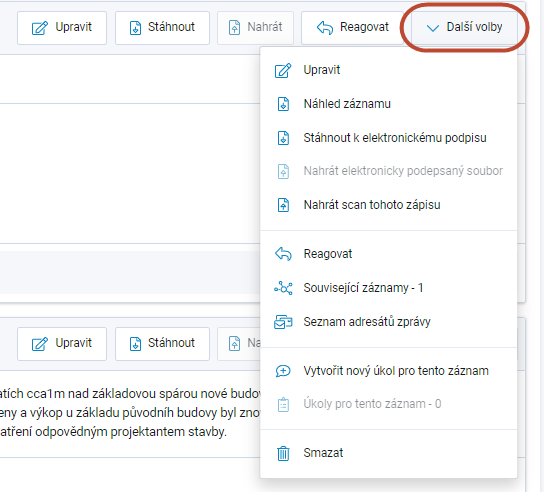
The Additional options button is available in the upper-right corner of each record and provides various options for working with the record. The most frequently used functions are displayed in the record header as separate buttons.
Edit can only be used by the author of the record and only until the record has been signed or a response has been created for it.
Record preview - displays the record in PDF format in the browser.
Download for electronic signature, Upload electronically signed file, and Upload scan of this record are related to signing or locking the record and are explained in a separate section.
Respond - this option creates a response to the selected record and links it to that record. More information about this functionality is provided below.
Related records - this option is inactive until a response has been created for the record. It is used to display the thread containing the original record and all responses belonging to it.
Message recipients allows you to send a notification about the added record by email to any authorized person in the diary. See below for more information.
Create a new ticket for this record and Tickets for this record are related to the Ticket Management module and are described in a separate section.
Delete can only be used by the author of the record and only until the record has been signed or a response has been created for it. If an unsigned record that already has a response needs to be deleted, the response must first be deleted, followed by the relevant record.
Respond and Related Records
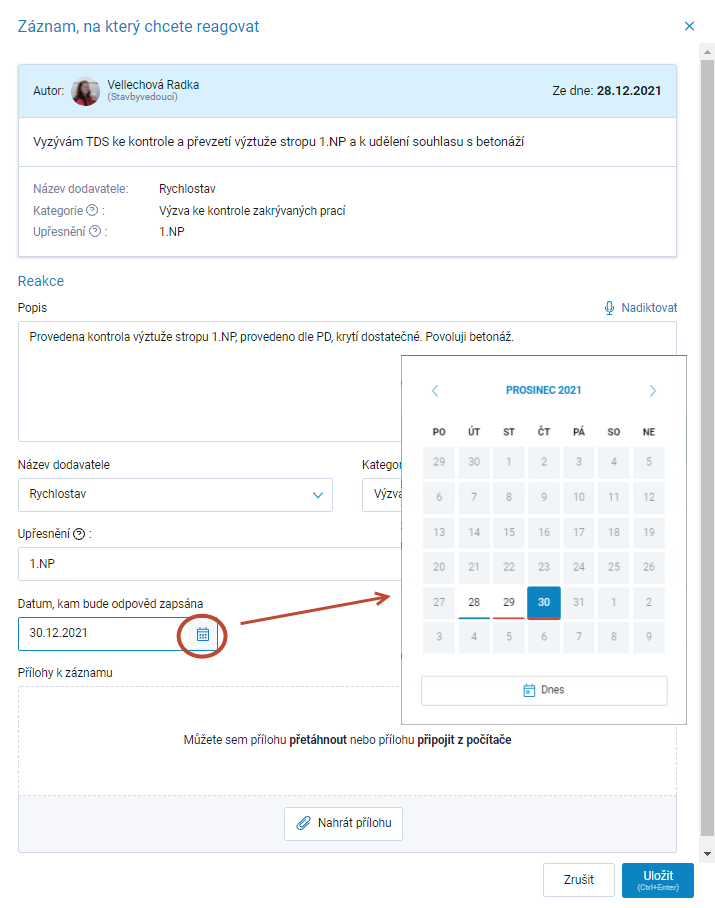
When Respond is selected, the Record you want to respond to window opens for editing the response. The upper part of the window displays the complete record you are responding to, with the editing fields below it.
The author enters their response in the Description field.
The contents of the Contractor Name, Category, and Specification fields are automatically copied from the original record by default.
In the Date on which the response will be recorded field, the application automatically sets the current date. The date can be changed using the calendar icon. The displayed calendar only offers days on which the response can actually be entered. If previous days have not yet been signed, the response can be entered on one of those previous days, but no later than the day containing the record to which you are responding.
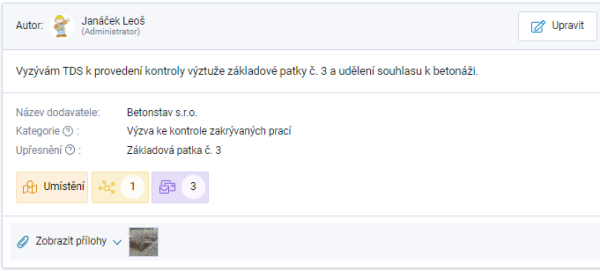
A yellow Related records icon indicates that a response has been added to a record. The number indicates how many responses have been made to the record. Clicking the icon opens the Response thread for an other record window.
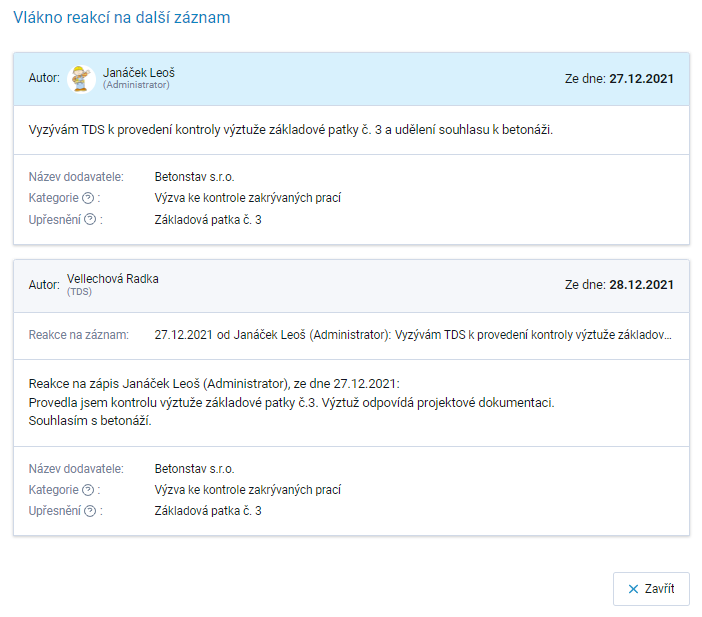
The Response thread for an other record window displays all records that are related to one another, meaning they were created using the Respond option. The current record is always highlighted with a blue header, and all preceding and subsequent records in the thread are visible.
Sending an Email and Message Recipients

Due to the nature of the Other Records section, a quick response from the other party is often required. To ensure that the relevant person is informed about a record in time, an email notification function is available through the Message recipients option in the Additional options menu.
The Other Records notification window opens with a list of all authorized persons. By checking the box on the left, you can send a message by email to any person on the list, including sending notifications repeatedly.
Any person's record can be opened from the list to display their email address and role. For people who have been sent a notification, the date and time when it was sent are also displayed.
People who have been invited to the project by the Project Administrator but have not yet created an account in the application are marked with a red exclamation mark.
A purple Message recipients icon in the record indicates that a notification has been sent. The number indicates how many people received the notification. Clicking the icon opens the Other Records notification window. For all recipients who have received the notification email, the envelope icon on the left is displayed in blue.
Notifications can be sent automatically by checking the Email notification when an Other Record is added option in Identification Data → Authorized Persons, in the editing window for the relevant person. This person must be allowed to use this function by selecting According to Project Diary settings under Project Settings → Project Team → “Email notification - Project Diary”.
$$