
Table of Contents
New Ticket
The basic way to create a ticket is to use the  option on the left above the ticket grid in the Ticket List or above the Ticket Kanban. If this option is grayed out / inactive, the user does not have permission to create tickets.
New Ticket Form:
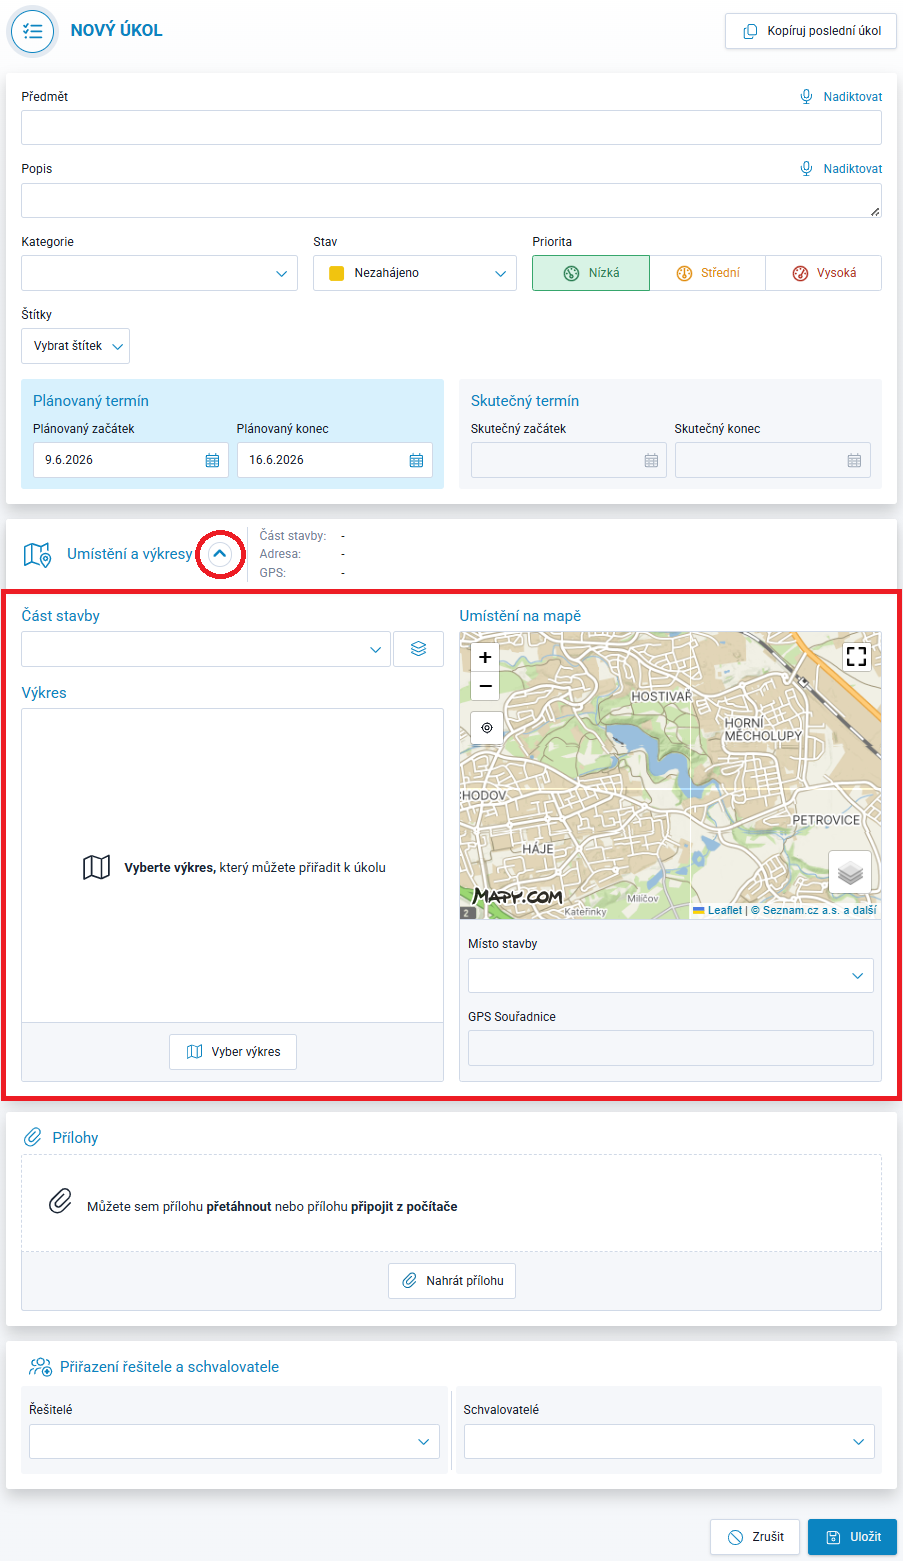
The new ticket form has a section collapsed by default, which is marked with a red frame in the image.
The ticket author enters the Subject - a concise and descriptive name for the ticket.
Description - a space for a detailed description of the ticket, if needed.
Category - the default categories can be modified by the administrator in Project Settings.
Status - when creating a ticket, the following statuses are available: Draft / Not Started / In Progress / On Hold.
In the Ticket Kanban, a ticket can be created using the + icon in the header of the Draft / Not Started / In Progress / On Hold columns. A ticket created this way has its status preselected according to the column from which the option was launched.
The author specifies the ticket priority.
A Label can be added if labels have been configured.
Planned Dates - the start date is preset to the current date and the end date to +7 days. The author can change these dates.
The ticket can be localized on a drawing using markers or on the map. To do this, expand the Location and Drawings section using the corresponding icon to display the drawing selection field and map.
Drawings must be uploaded under Project Parts and Drawings to enable adding markers to them - LINK. Clicking a selected drawing opens an enlarged view, where markers can be placed by double-clicking the desired locations.
On the map, a marker can be placed by clicking the desired location or by entering an address in the Project Location field below the map.
On the Drawings and Map page, a ticket can be created by double-clicking the desired location in the relevant drawing or on the map. A ticket created this way has a pre-filled drawing marker or map location at the point where the user double-clicked.
Attachments - the author can attach photographs, documents, etc., if needed.
Assignees and Approvers - the author specifies who should handle the ticket and who should approve it, selecting from users who are members of the Project Team. Multiple people can be selected.
By defining Rules for Assignees / Approvers, these fields will be filled in automatically when the conditions of the ticket being created are met, with the option to modify them.
New Related Ticket
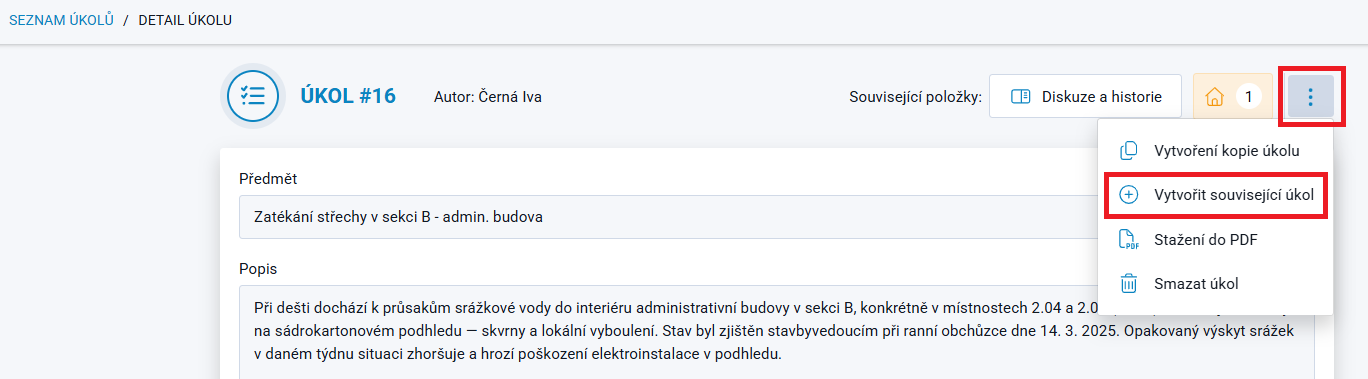
Buildary provides the option to create a ticket linked to another ticket.
In the details of an existing ticket, selecting Create Related Ticket opens the New Ticket form with a link to the selected ticket. The link can be removed at the end of the form.
New Ticket by Copying a Ticket
1/ Copying the Last Created Ticket ⇒ the Copy Last Ticket option is available on the New Ticket page in the top-right corner, as shown in the New Ticket form above.
The new ticket will be pre-filled with data from the last created ticket (subject / category / selected drawing without markers / project location / assignees / approvers).
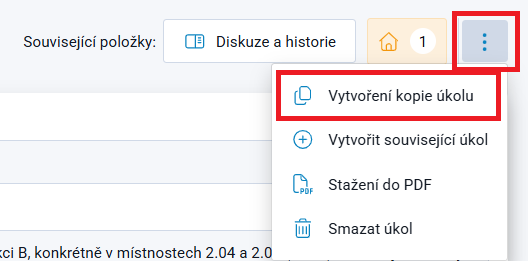
2/ Copying a Ticket ⇒ in the details of an existing ticket, there is an option to Create a Copy of the Ticket.
With the exception of the status and label, all data is copied to the new ticket, including markers on the drawing and map, attachments, and dates. The author can edit everything as needed.
New Ticket from a Project Diary Record
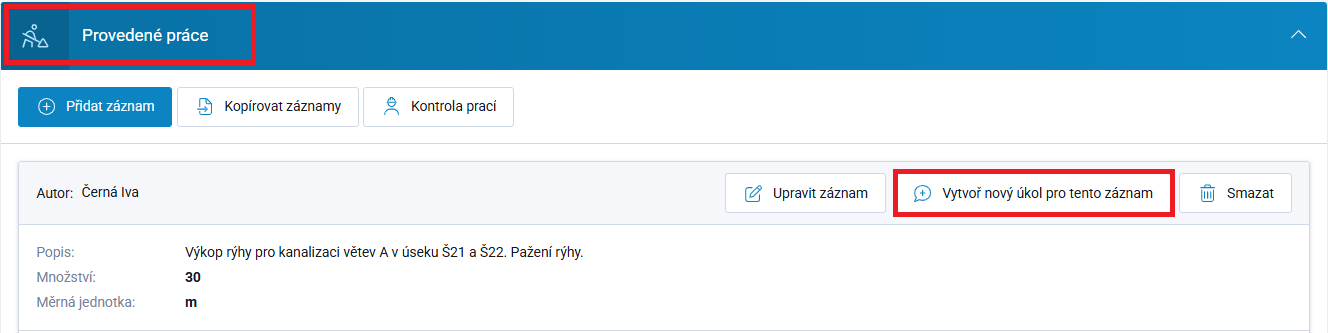
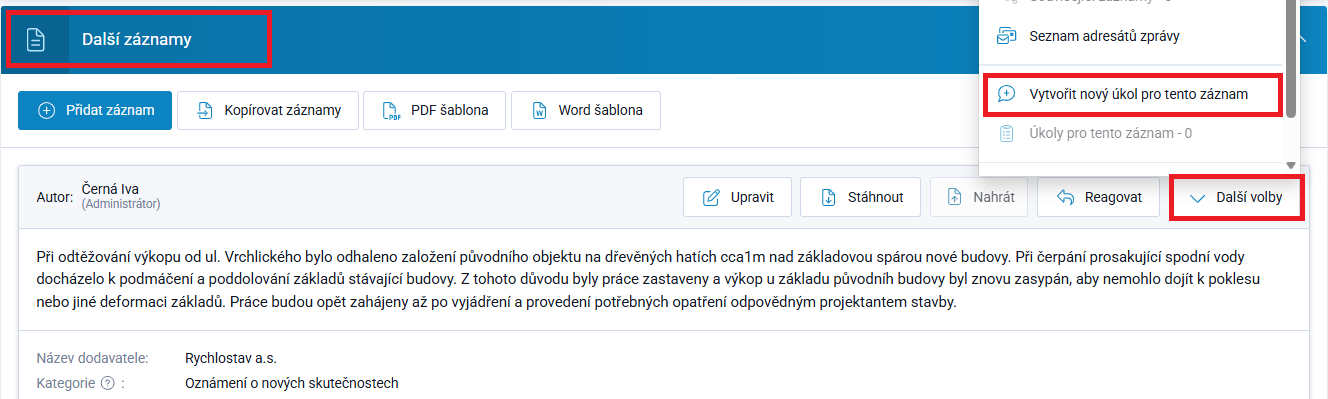
Users working with the Project Diary module can create tickets directly from diary records. The Ticket Management module must be enabled for the project.
Tickets can be created from records in the Performed Works and Additional Records sections:
Displaying Related Tickets
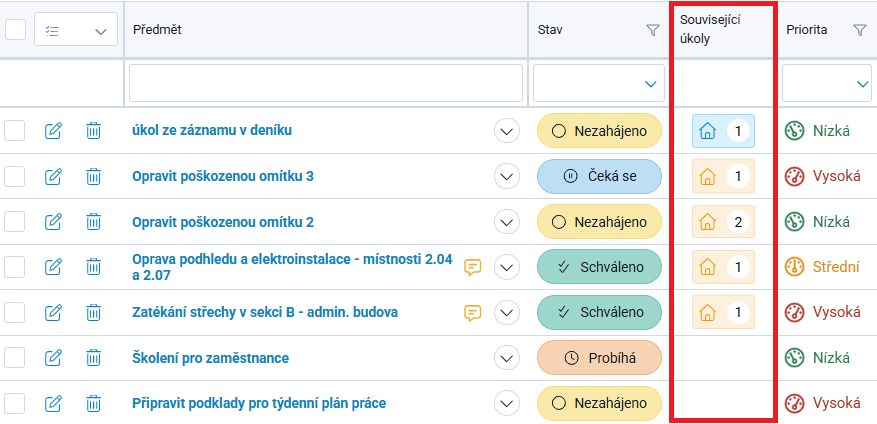
Tickets linked to diary records or other related tickets can be displayed in the Ticket List by adding the Related Tickets column.
The blue  icon indicates a ticket linked to a Project Diary record. The icon is active and opens the relevant diary on the day containing the related record.
The orange  icon indicates a ticket linked to one or more other tickets. The number indicates the number of related tickets. The icon is active and opens the related ticket thread, from which the user can navigate to the details of the linked ticket.