
Table of Contents
New Ticket
A new ticket can be created from the Ticket List page in the standard way using the  icon, or from a photo using the
  icon.
icon.
1/ New Ticket - Standard Ticket Creation
Basic Ticket Information
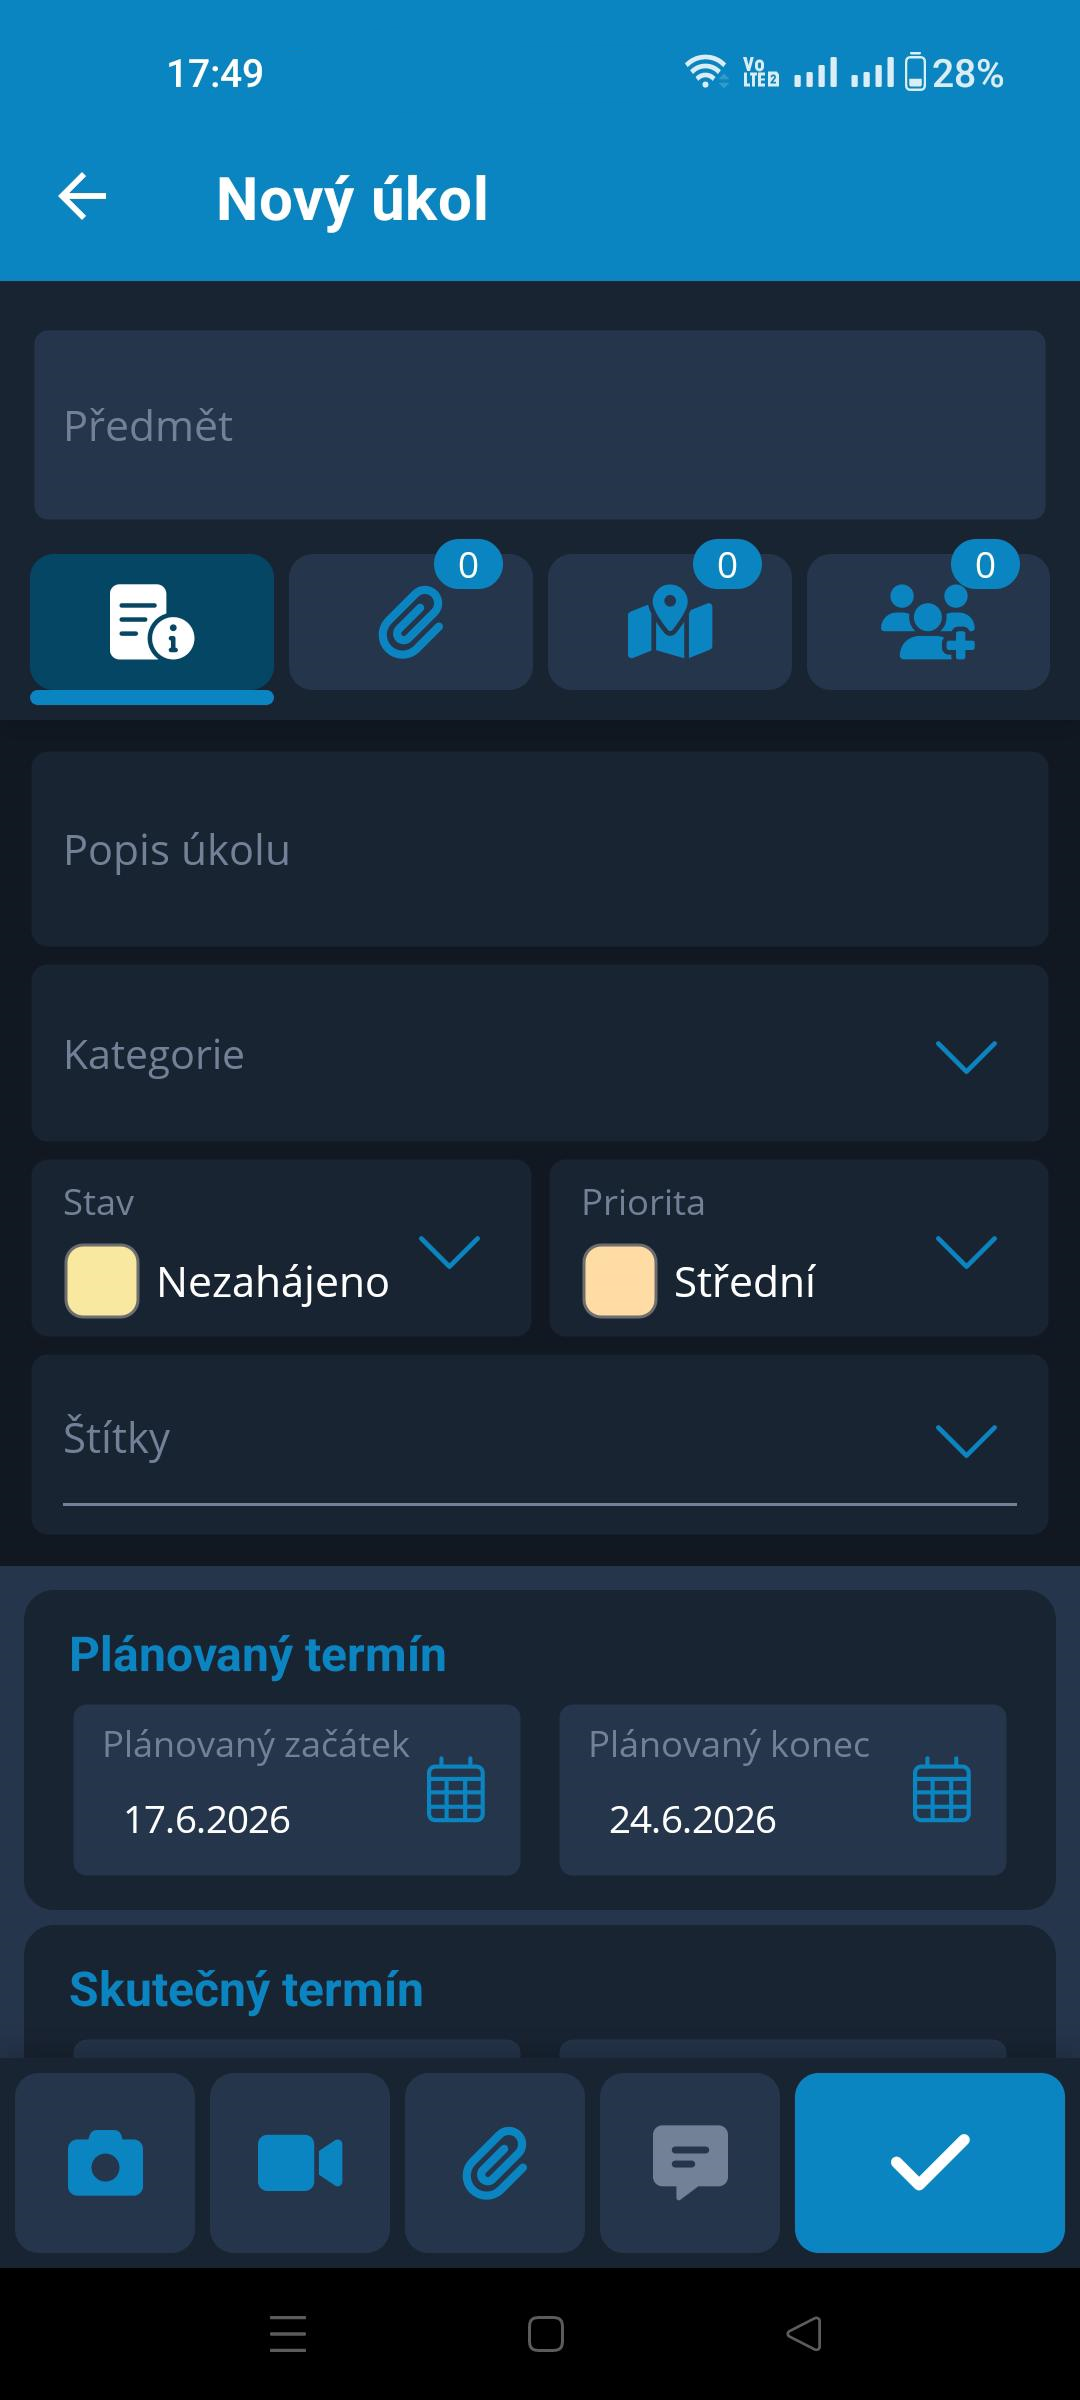
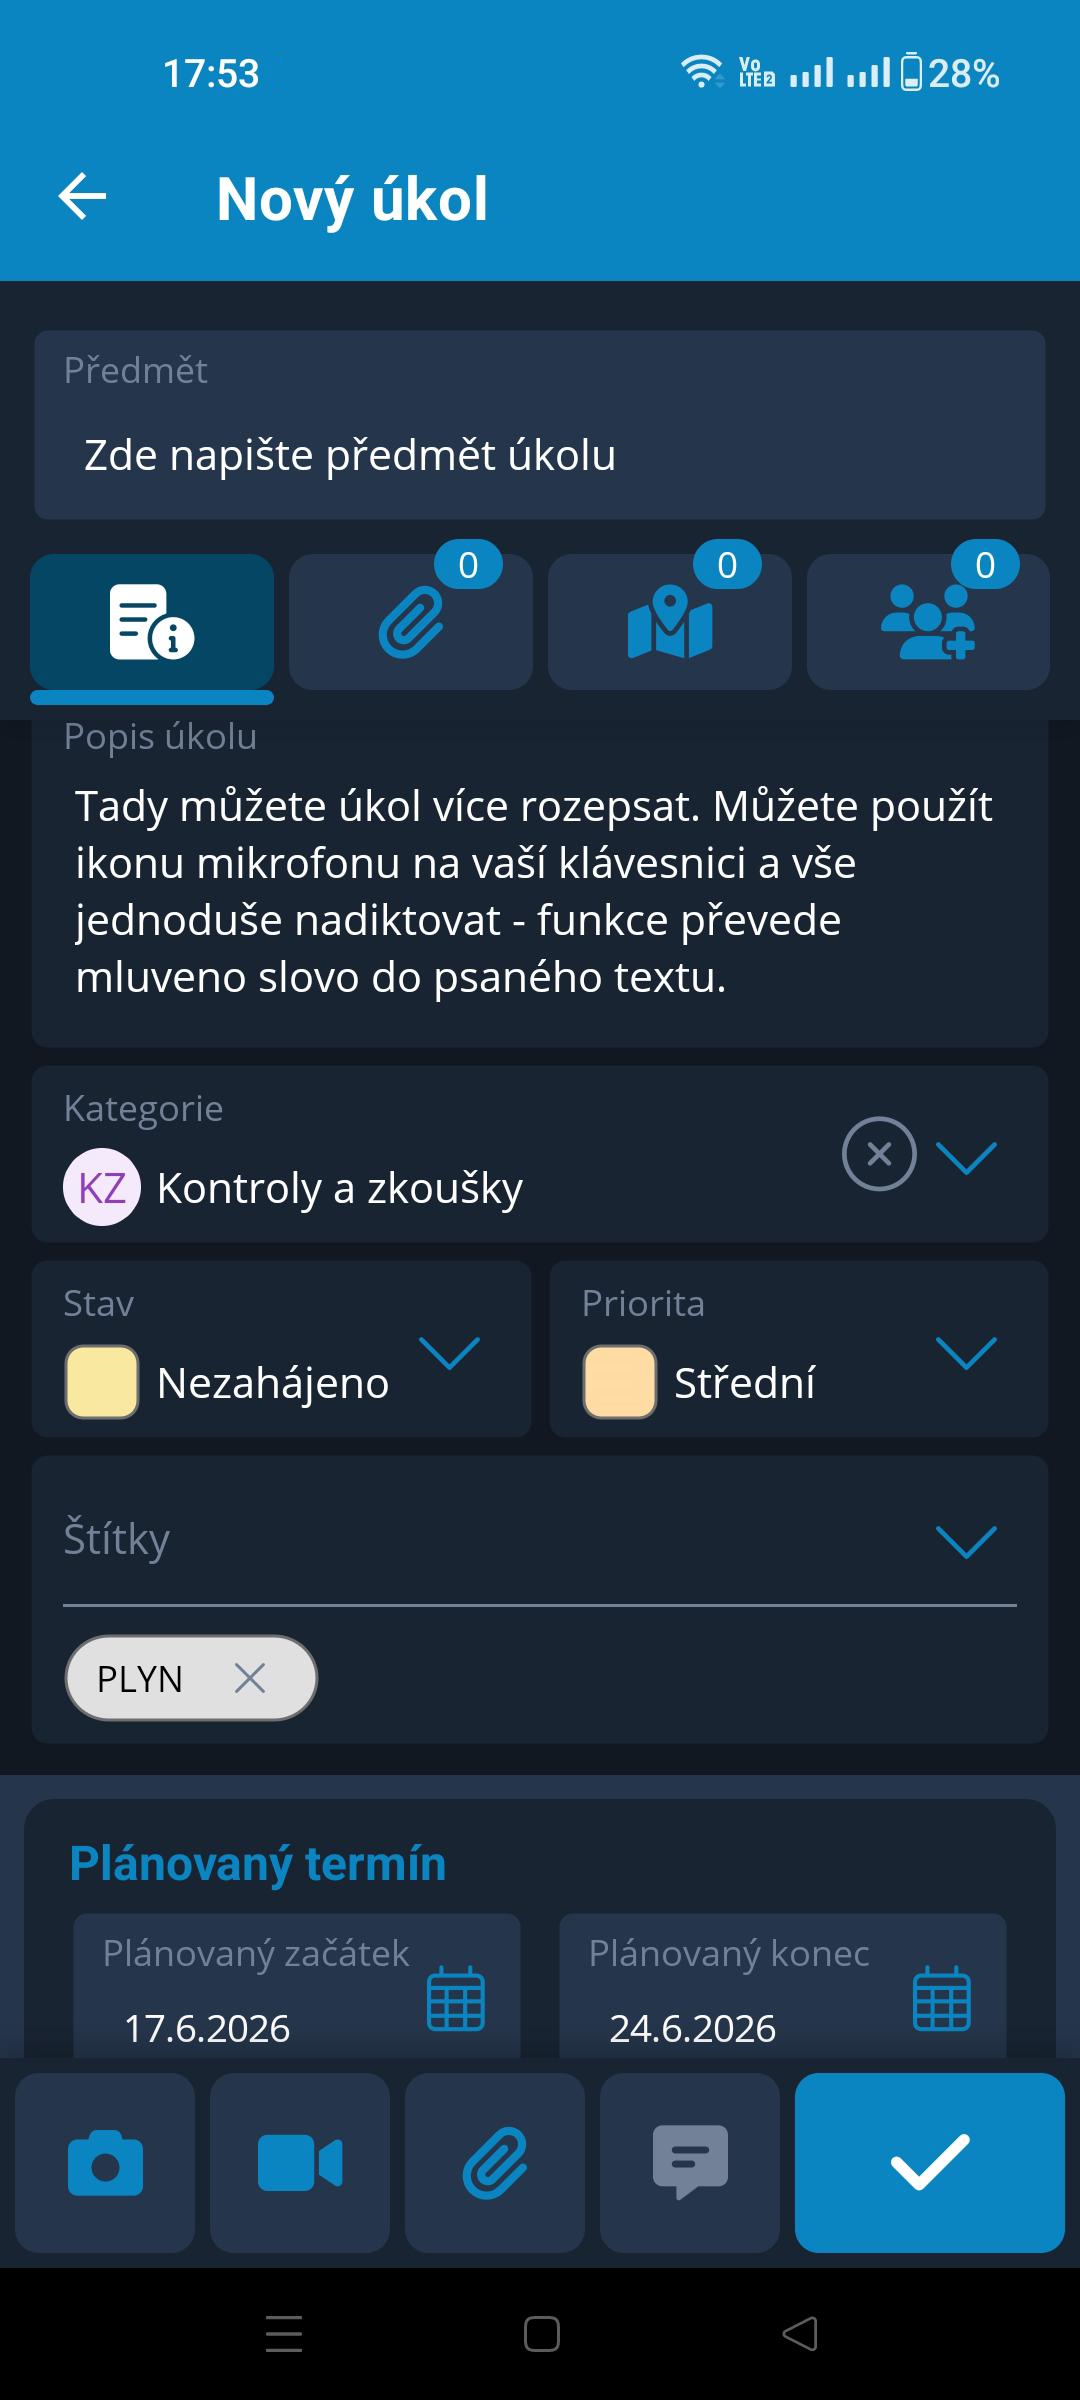
Creating a new ticket using the icon opens the form shown in the first image. After entering all the required information, the author saves the ticket using the checkmark icon  in the bottom-right corner.
In the Subject field, the author enters the ticket name, preferably short and descriptive.
Below this field are the section tabs: Basic Information (current page) / Attachments / Drawings and Map / Participants (assignees and approvers) → we recommend completing the initial page first and only then switching to another section.
The Ticket Description field can be used to provide more details if everything is not clear from the Subject.
To enter the description, the user can use the microphone icon on the device keyboard. Pressing the icon activates speech-to-text. The function can be deactivated by pressing the icon again, or it will deactivate automatically after a longer period of silence. This device functionality can be used anywhere the keyboard appears after tapping an input field.
Category displays a code list from which the author selects one option.
Status is set to Not Started by default; the author can select another option from the code list.
Priority is set to Medium by default and can be changed by the author.
If Labels have been created in Project Settings, the author can select one or more options.
At the bottom are the calendars → Planned Dates are set by default as follows: the start date is the current day on which the ticket is created / the end date is +7 days ⇒ the author can change these preset dates. Actual Dates cannot be specified by the author.
Ticket Attachments
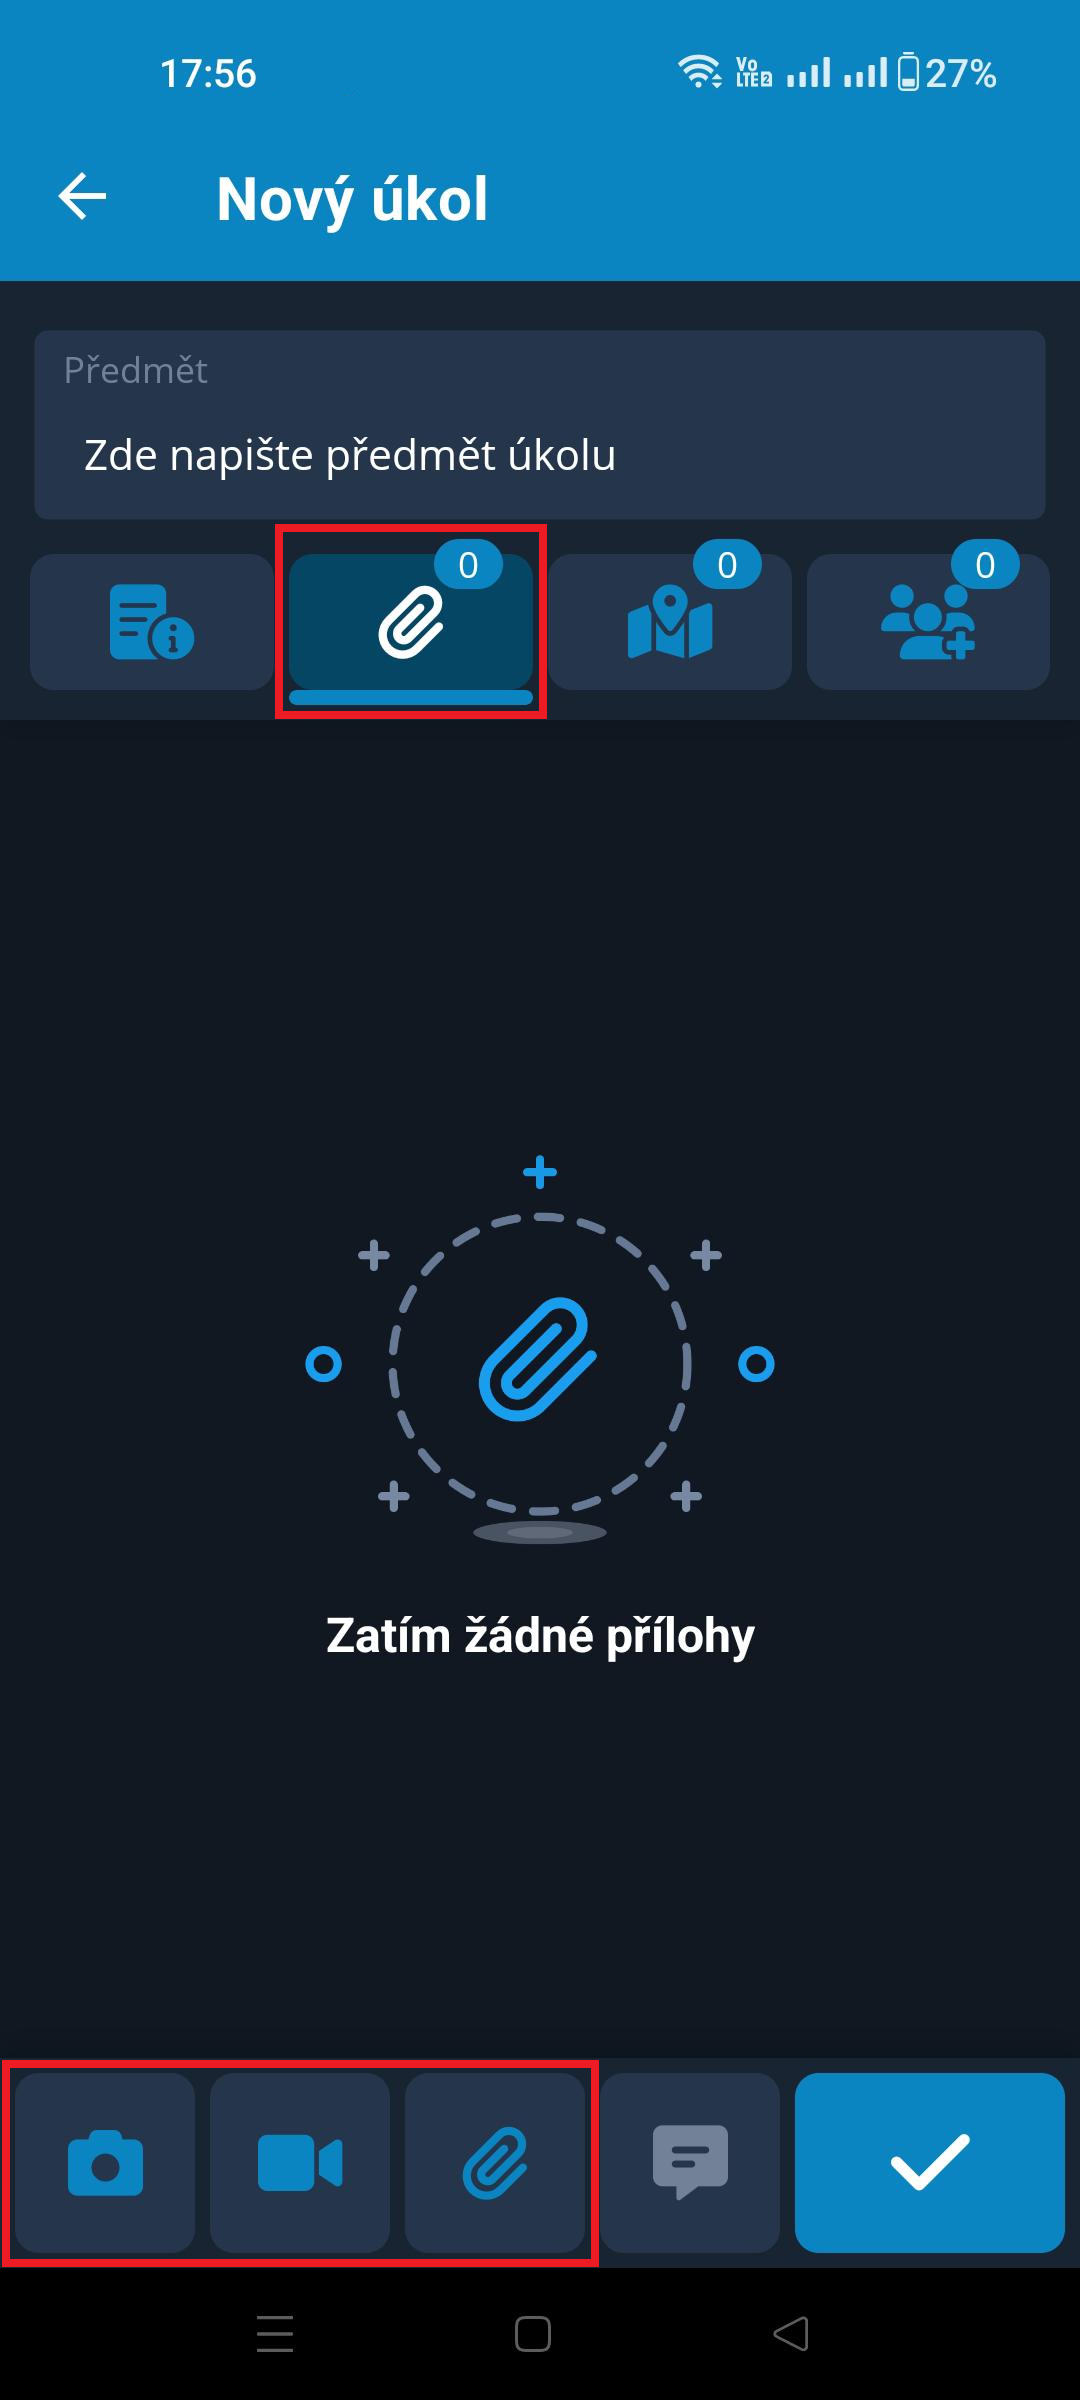
The three active icons at the bottom of the screen can be used to add attachments to the ticket:
- Camera icon
 ⇒ switches the device to camera mode, allowing the author to immediately take photos for the ticket being created. The photos are automatically added to the Attachments section.
 - Gallery icon
 ⇒ switches the device to the image gallery, where the author can select one or more saved photos / images for the ticket.
 - Paperclip icon
 ⇒ opens a menu for selecting how to add an attachment. In addition to the two options above, the menu contains other options.
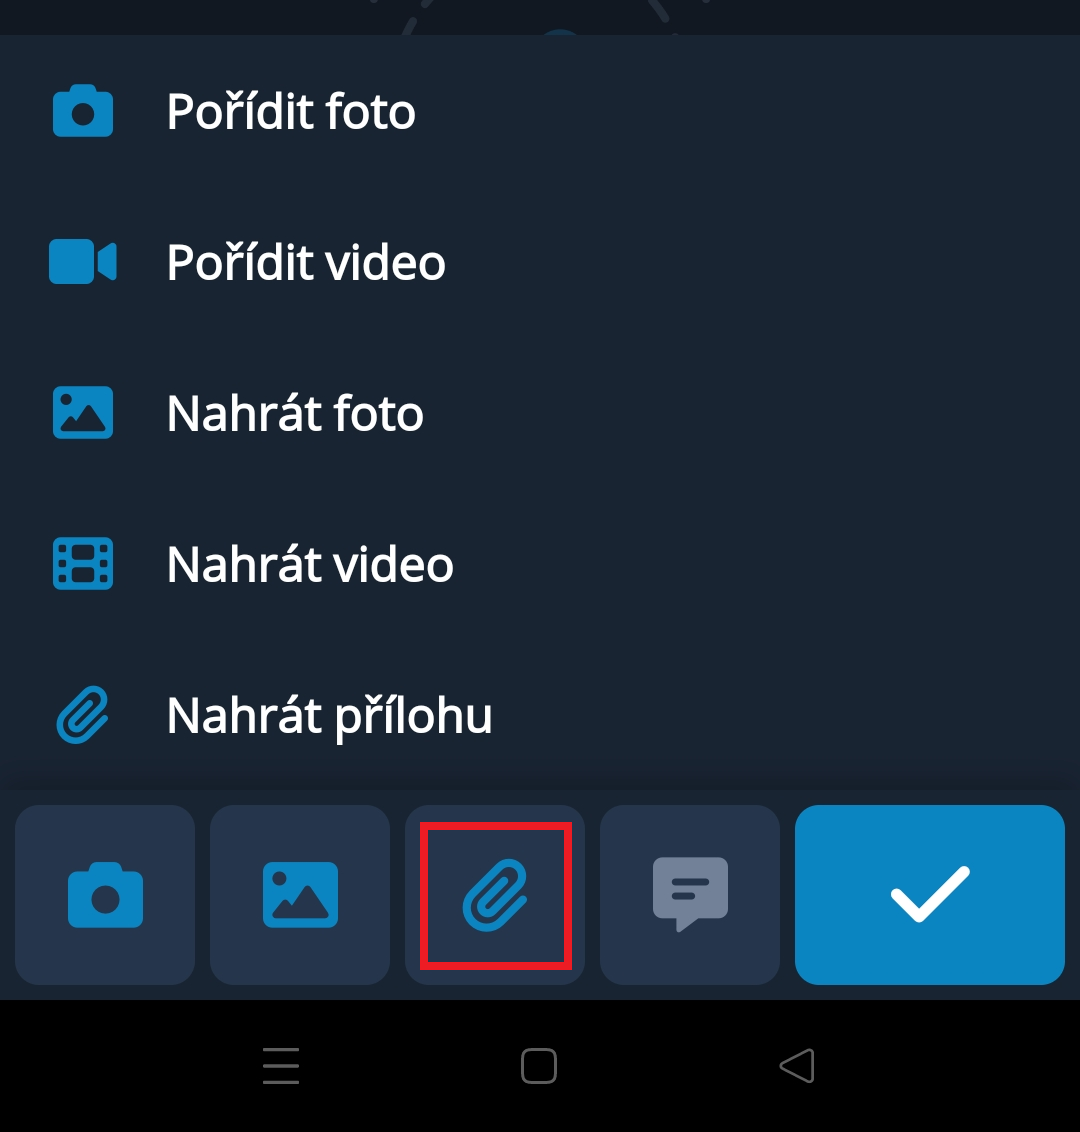
Photos and videos taken immediately are not saved to the author's device. When the ticket is saved, they are uploaded directly to the server. This means they do not unnecessarily take up storage space on the device.
The icons for adding attachments are visible and active even when the user is not currently in the Attachments section. For example, if the user uses the camera icon and takes a photo, it is automatically saved to Attachments even if another ticket section is currently open.
Drawings and Map
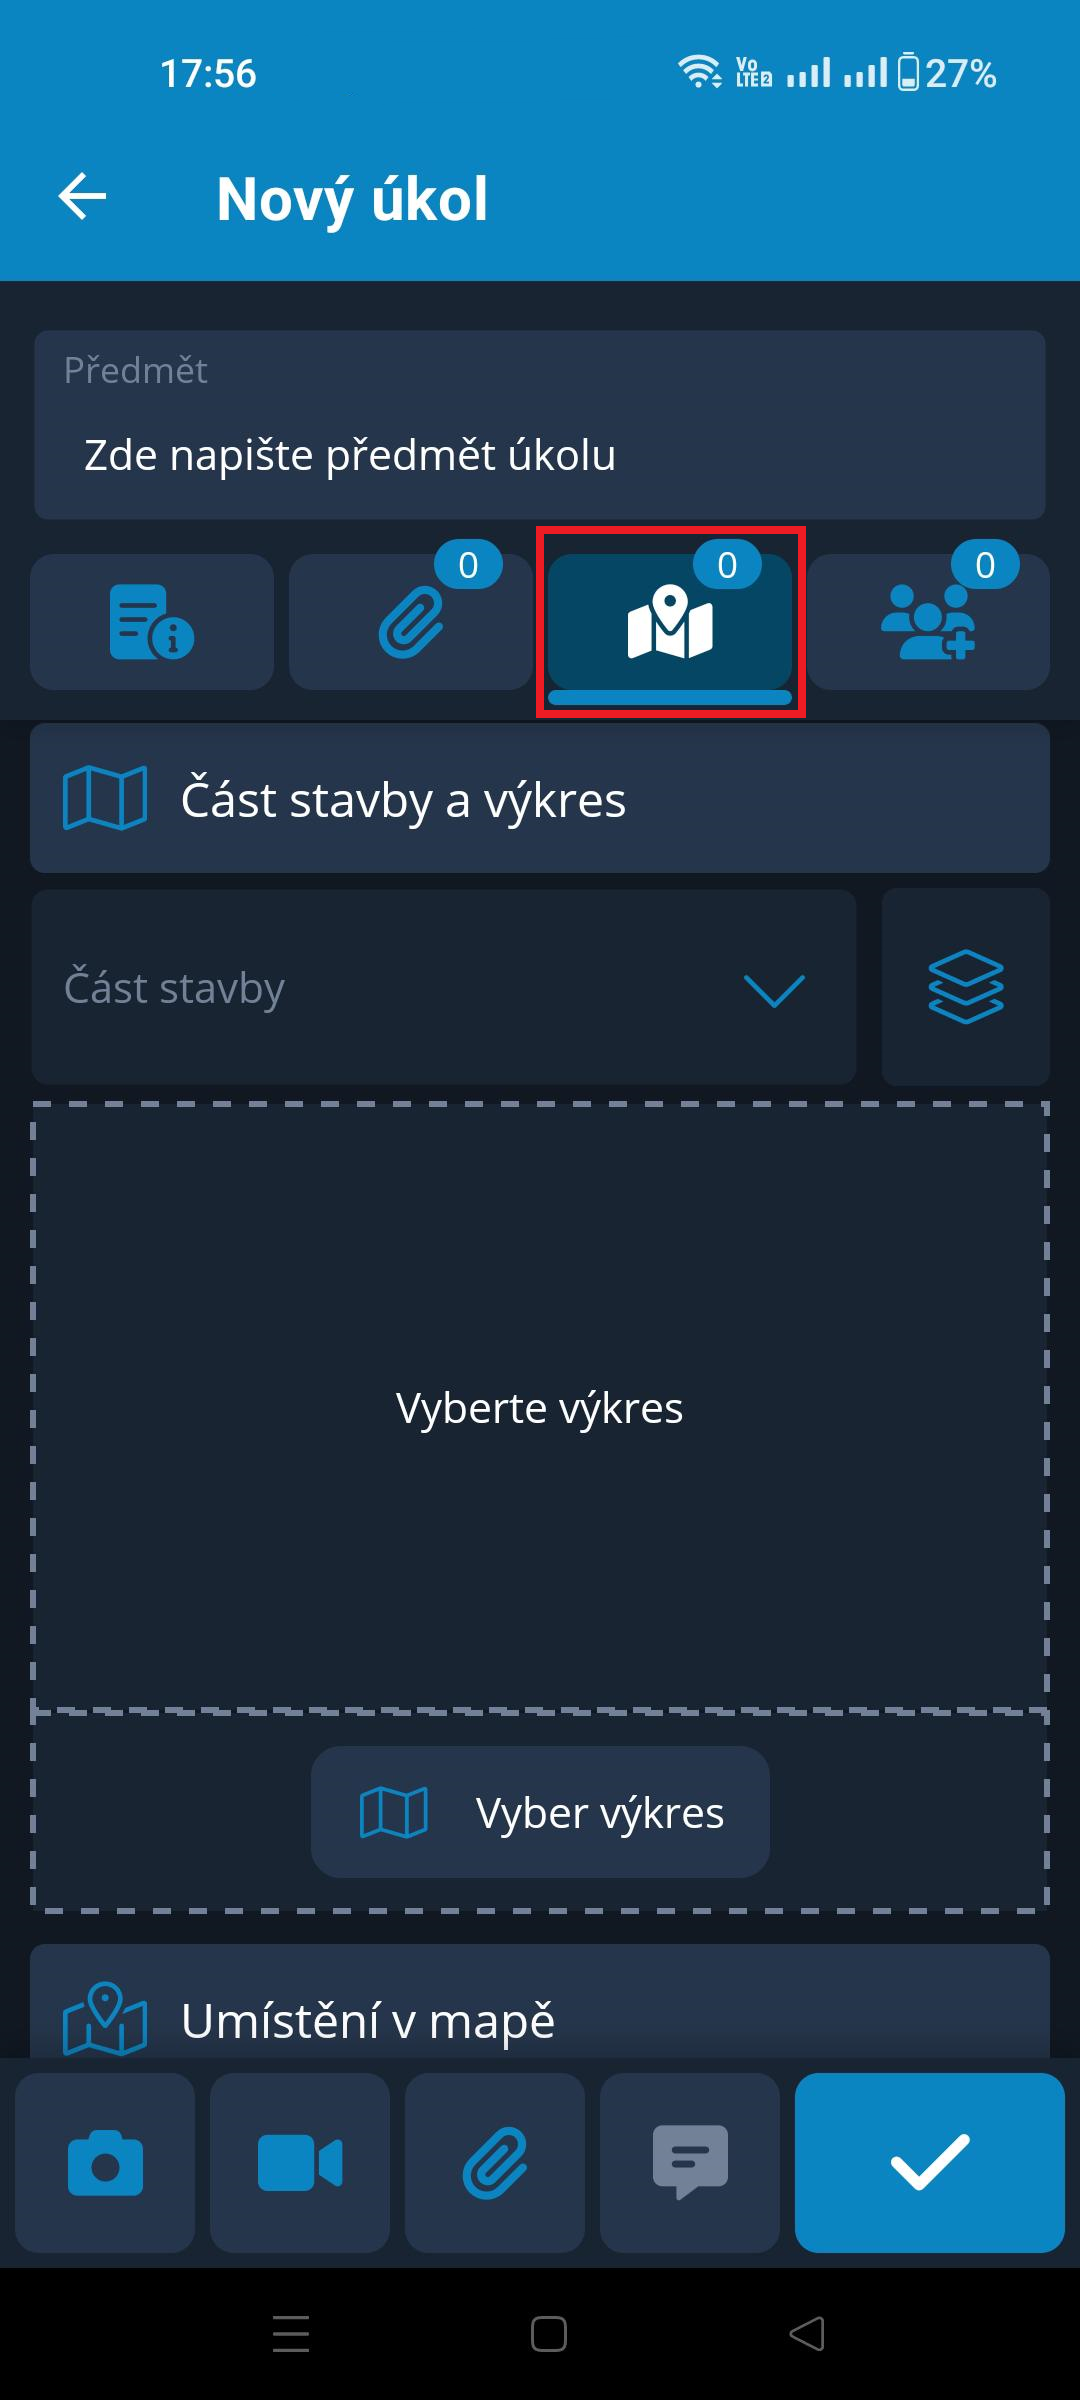
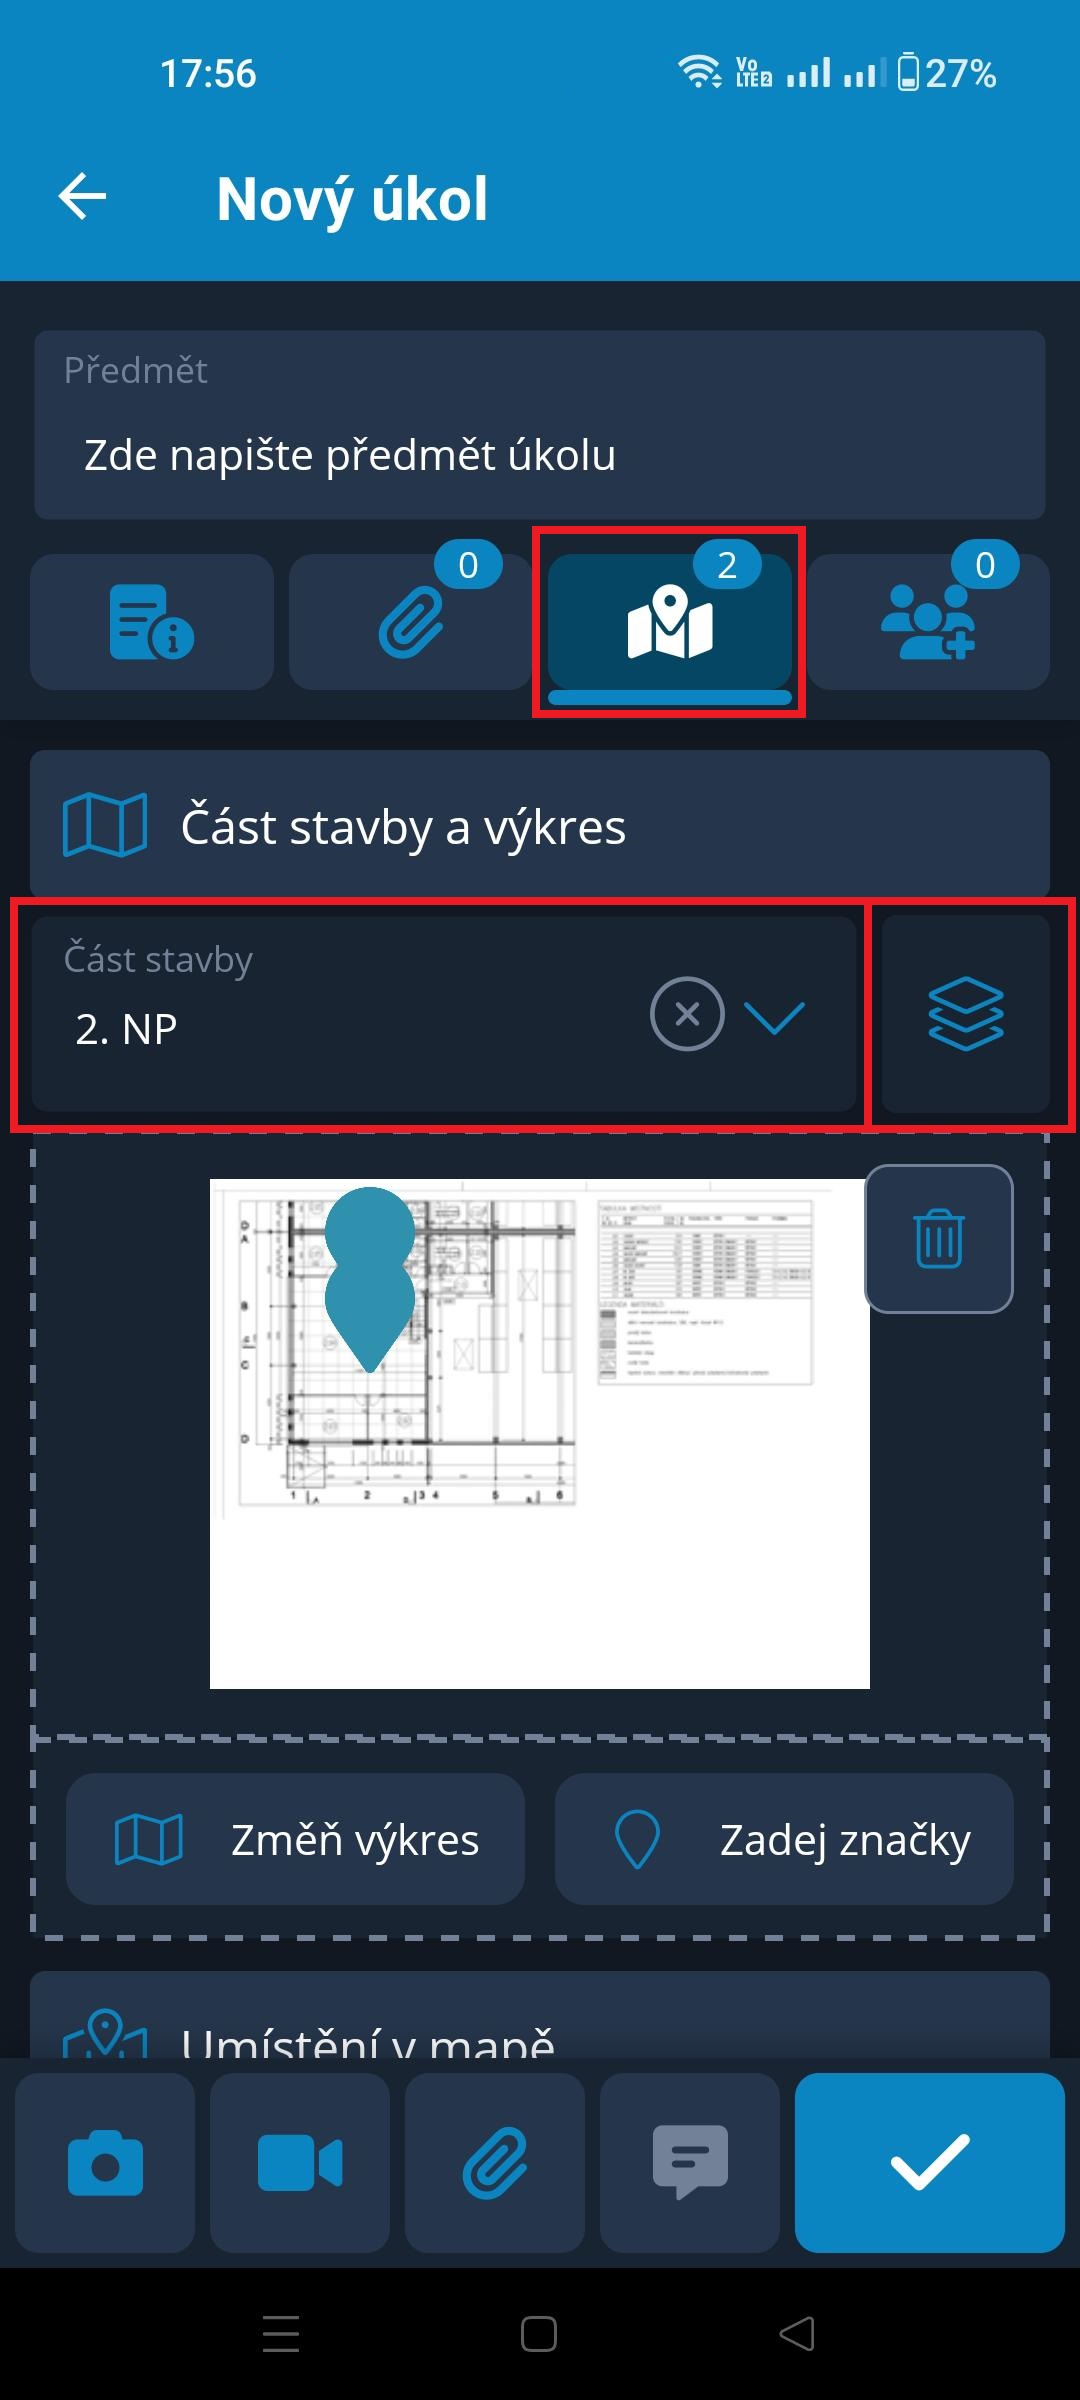
The author can provide a more precise location for the ticket by placing markers on a drawing or by specifying a location on the map.
To use a drawing, it must first be uploaded in Project Settings. The author can then select the relevant drawing in several ways:
- the Project Part field is a text field; as characters are entered, the autocomplete will offer items containing those characters
- the arrow icon at the end of the Project Part field expands the complete list of project parts, from which the author can select one
- the
 icon opens the list of project parts in a hierarchical structure, including the number of drawings assigned to each part
 - the Select Drawing icon opens a list of drawings displayed as thumbnails, allowing the author to select the drawing directly rather than selecting a project part
Regardless of how the drawing was selected, it is displayed as a thumbnail in the drawing area.
To add markers, simply tap the drawing itself or the Enter Markers option below it. The drawing opens in a new enlarged window, where it can be panned, zoomed in, zoomed out, etc. At the location where the marker should be placed, the author presses and holds their finger until the marker is created. Multiple markers can be added. If a marker needs to be moved or deleted, press and hold it until it becomes active, then move it to another location or to the trash icon that appears at the bottom of the screen. The drawing with markers must then be saved using OK in the top-right corner.
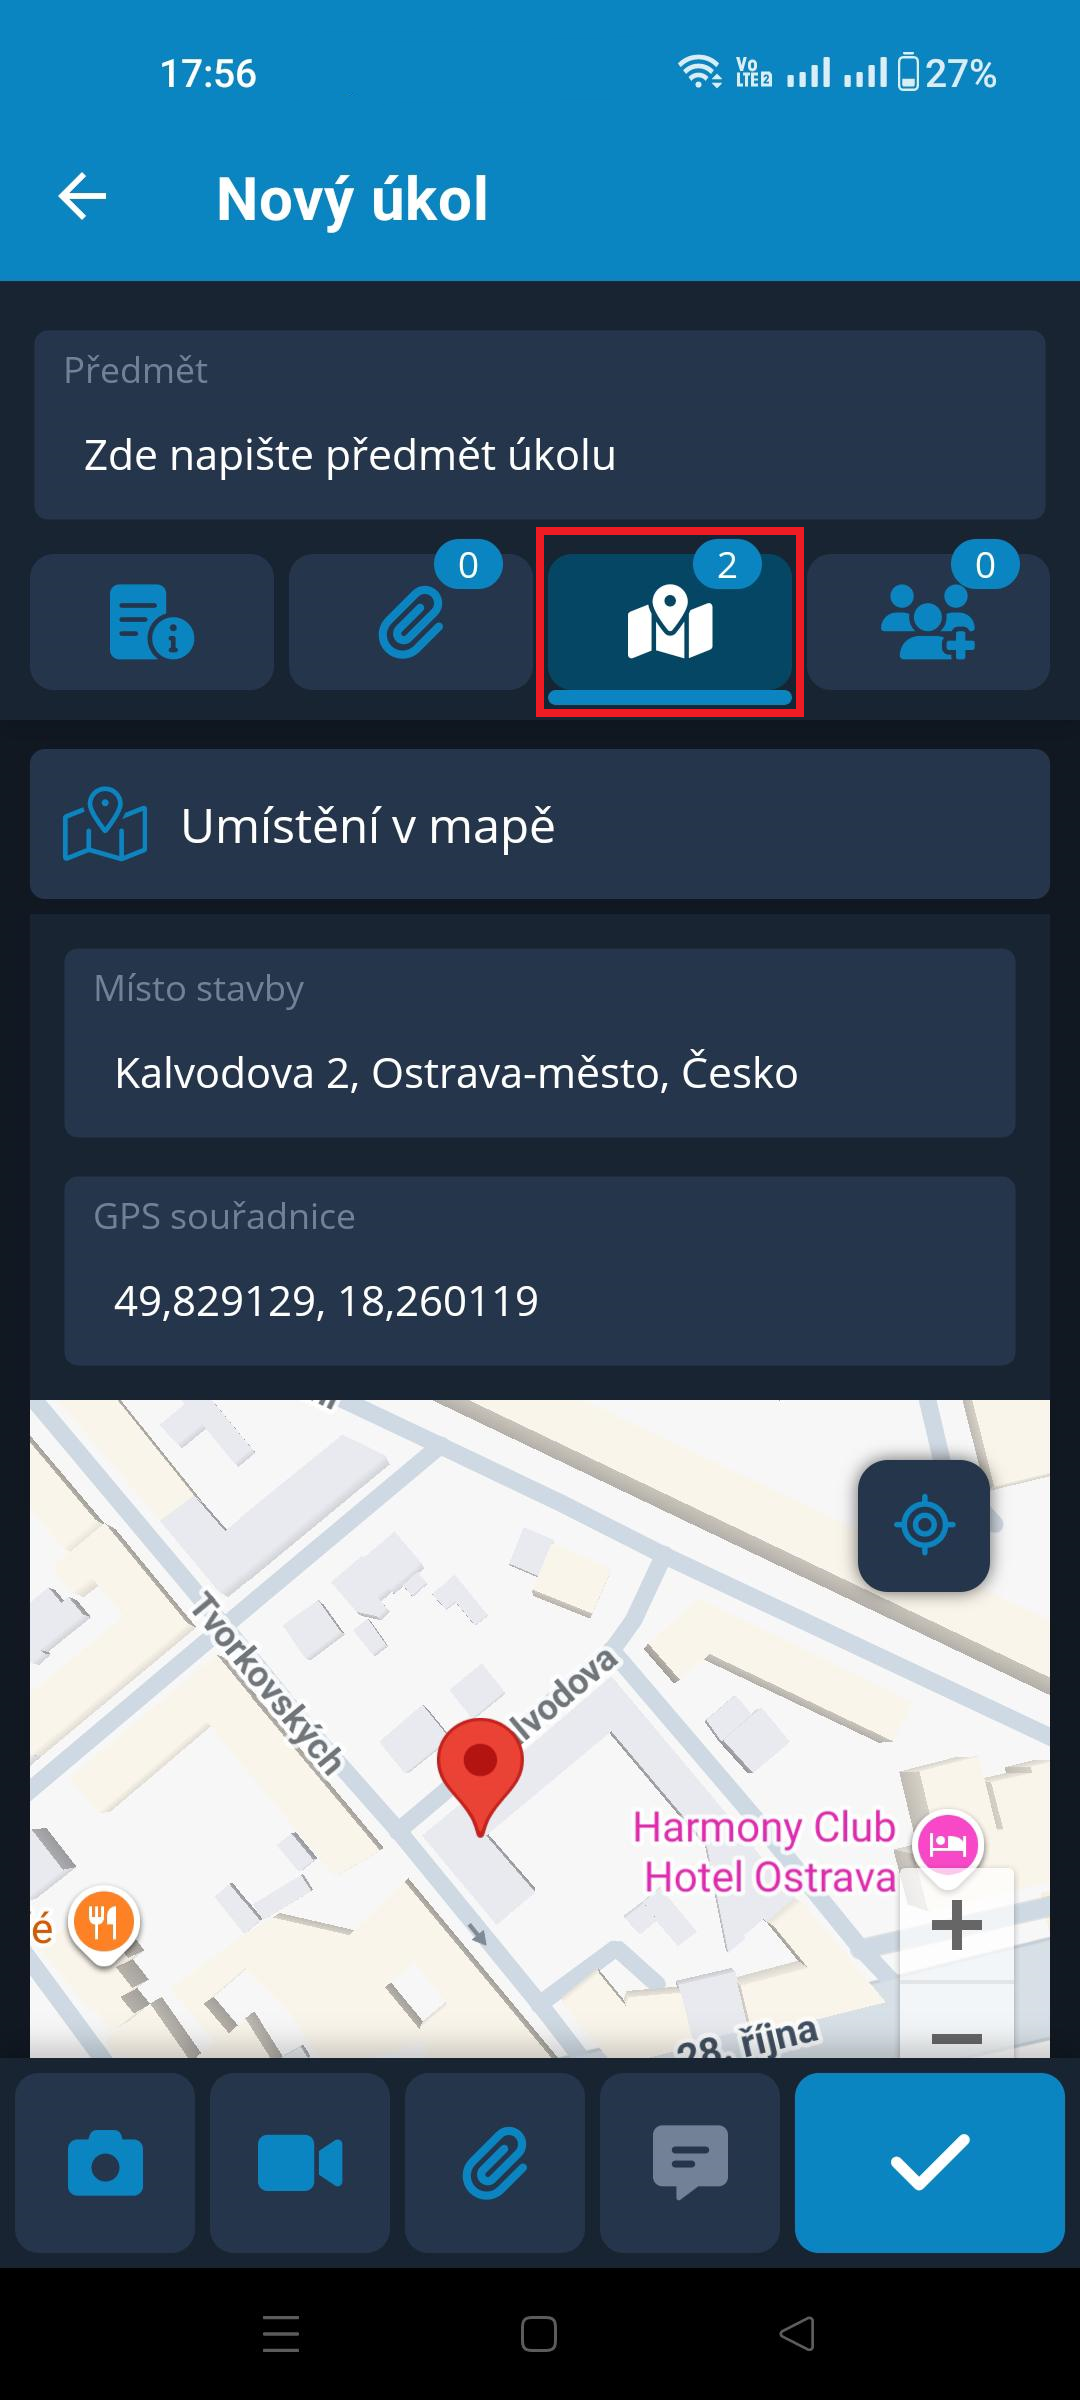
In the same section, below the drawing, there is a map. A marker can be placed on the map to localize the ticket location.
The marker can be created in two ways:
- tap a point on the map → if the user does not hit the exact location and needs to move the marker, simply tap the correct point and the marker will move there
- tap the
 icon on the map → the marker is automatically placed at the coordinates of the device being used
When a marker is placed on the drawing, the application automatically fills in the Project Location and GPS coordinates.
Ticket Participants
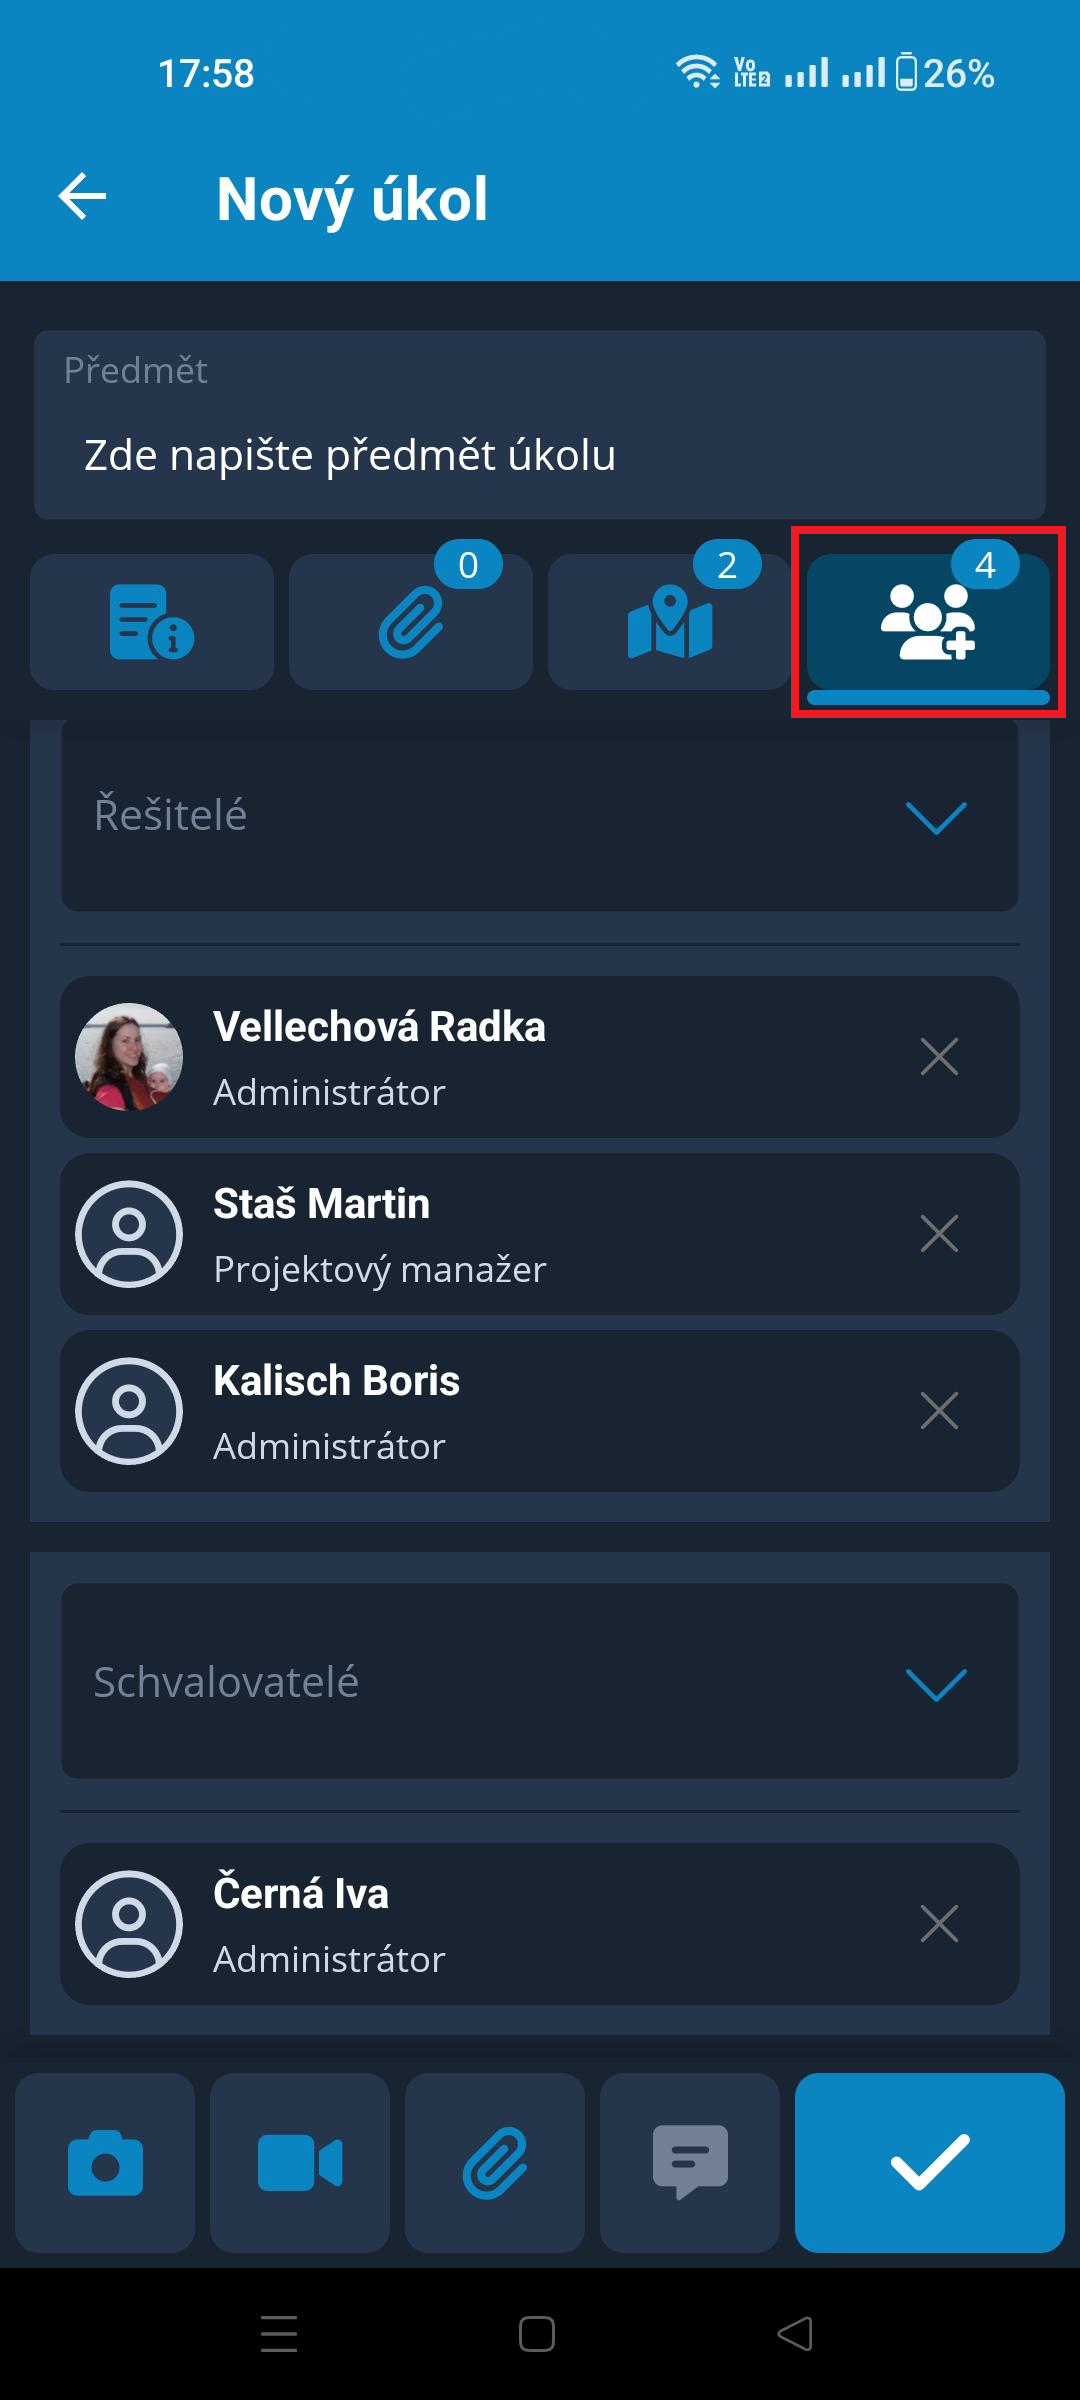
Before saving the ticket, it is necessary to specify the assignees and, if applicable, the approvers.
The author selects them from a code list containing all Project Team Members for the project. Multiple people can be selected for each role.
If the ticket creation meets an Assignees / Approvers Rule, the rule will be applied and the relevant roles will be assigned automatically according to the rule. This selection can still be changed in the ticket.
Save the ticket using the icon in the bottom-right corner.
2/ New Ticket - Creating a Ticket from a Photo
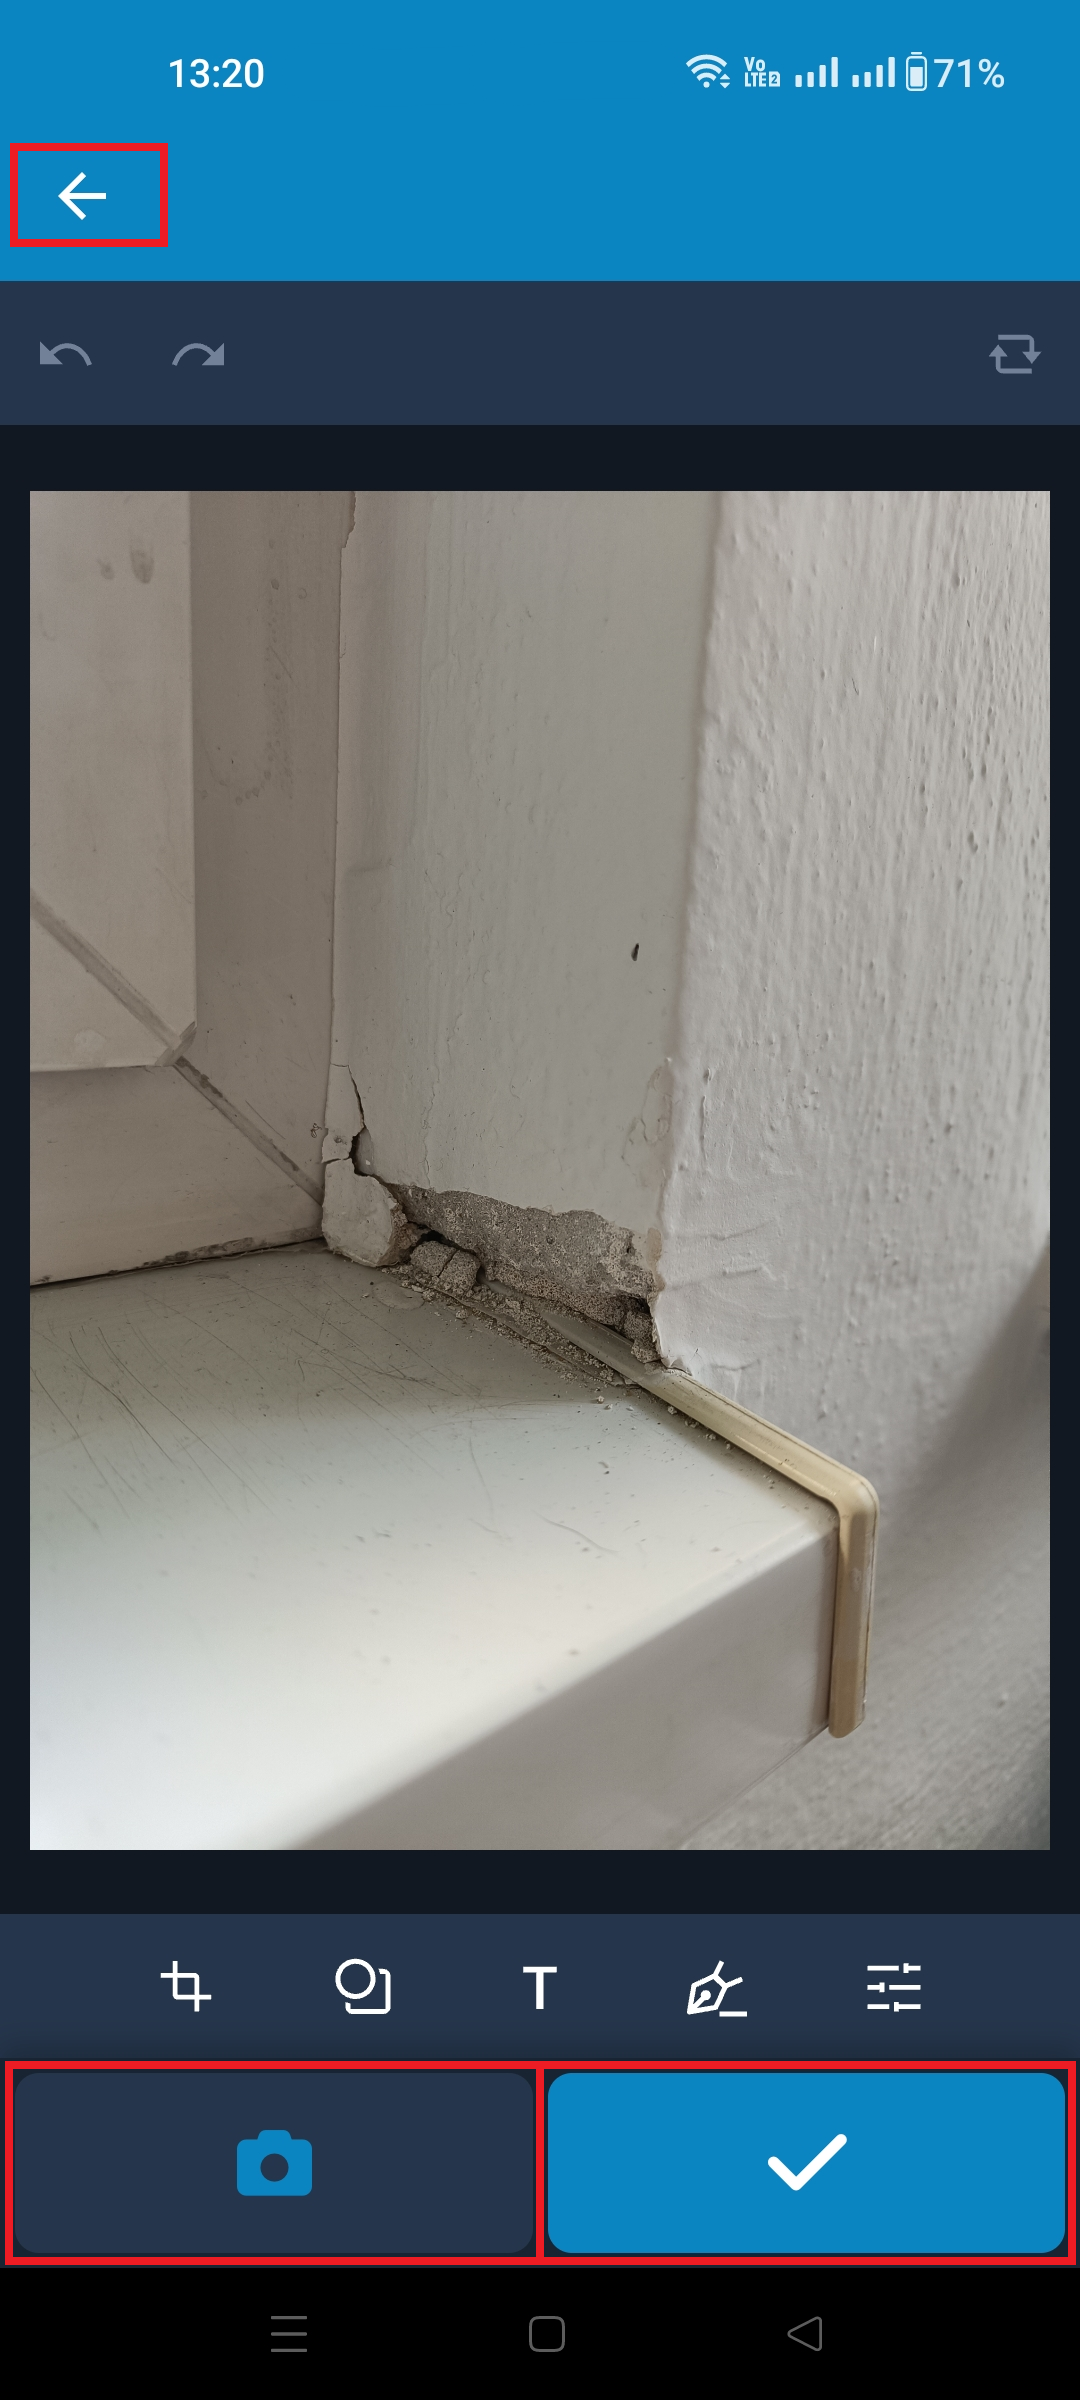
Creating a new ticket using the icon switches the device to camera mode. After taking a photo and confirming it with the checkmark, the image is opened in editing mode, allowing the author to edit the photo before saving it. If no edits are made at this stage, they can be made later while editing the ticket.
The icon in the bottom-right corner is used to save the photo and proceed to entering the ticket information.
If the author is not satisfied with the photo and wants to take another one, they can press the  icon in the bottom-left corner ⇒ the device camera is activated again and the author can take a better photo for the ticket. The original photo will then be replaced by the new one.
The back arrow in the top row cancels the entire action and returns to the Ticket List. IMPORTANT: The photo being left will not be saved!
Photo Editing
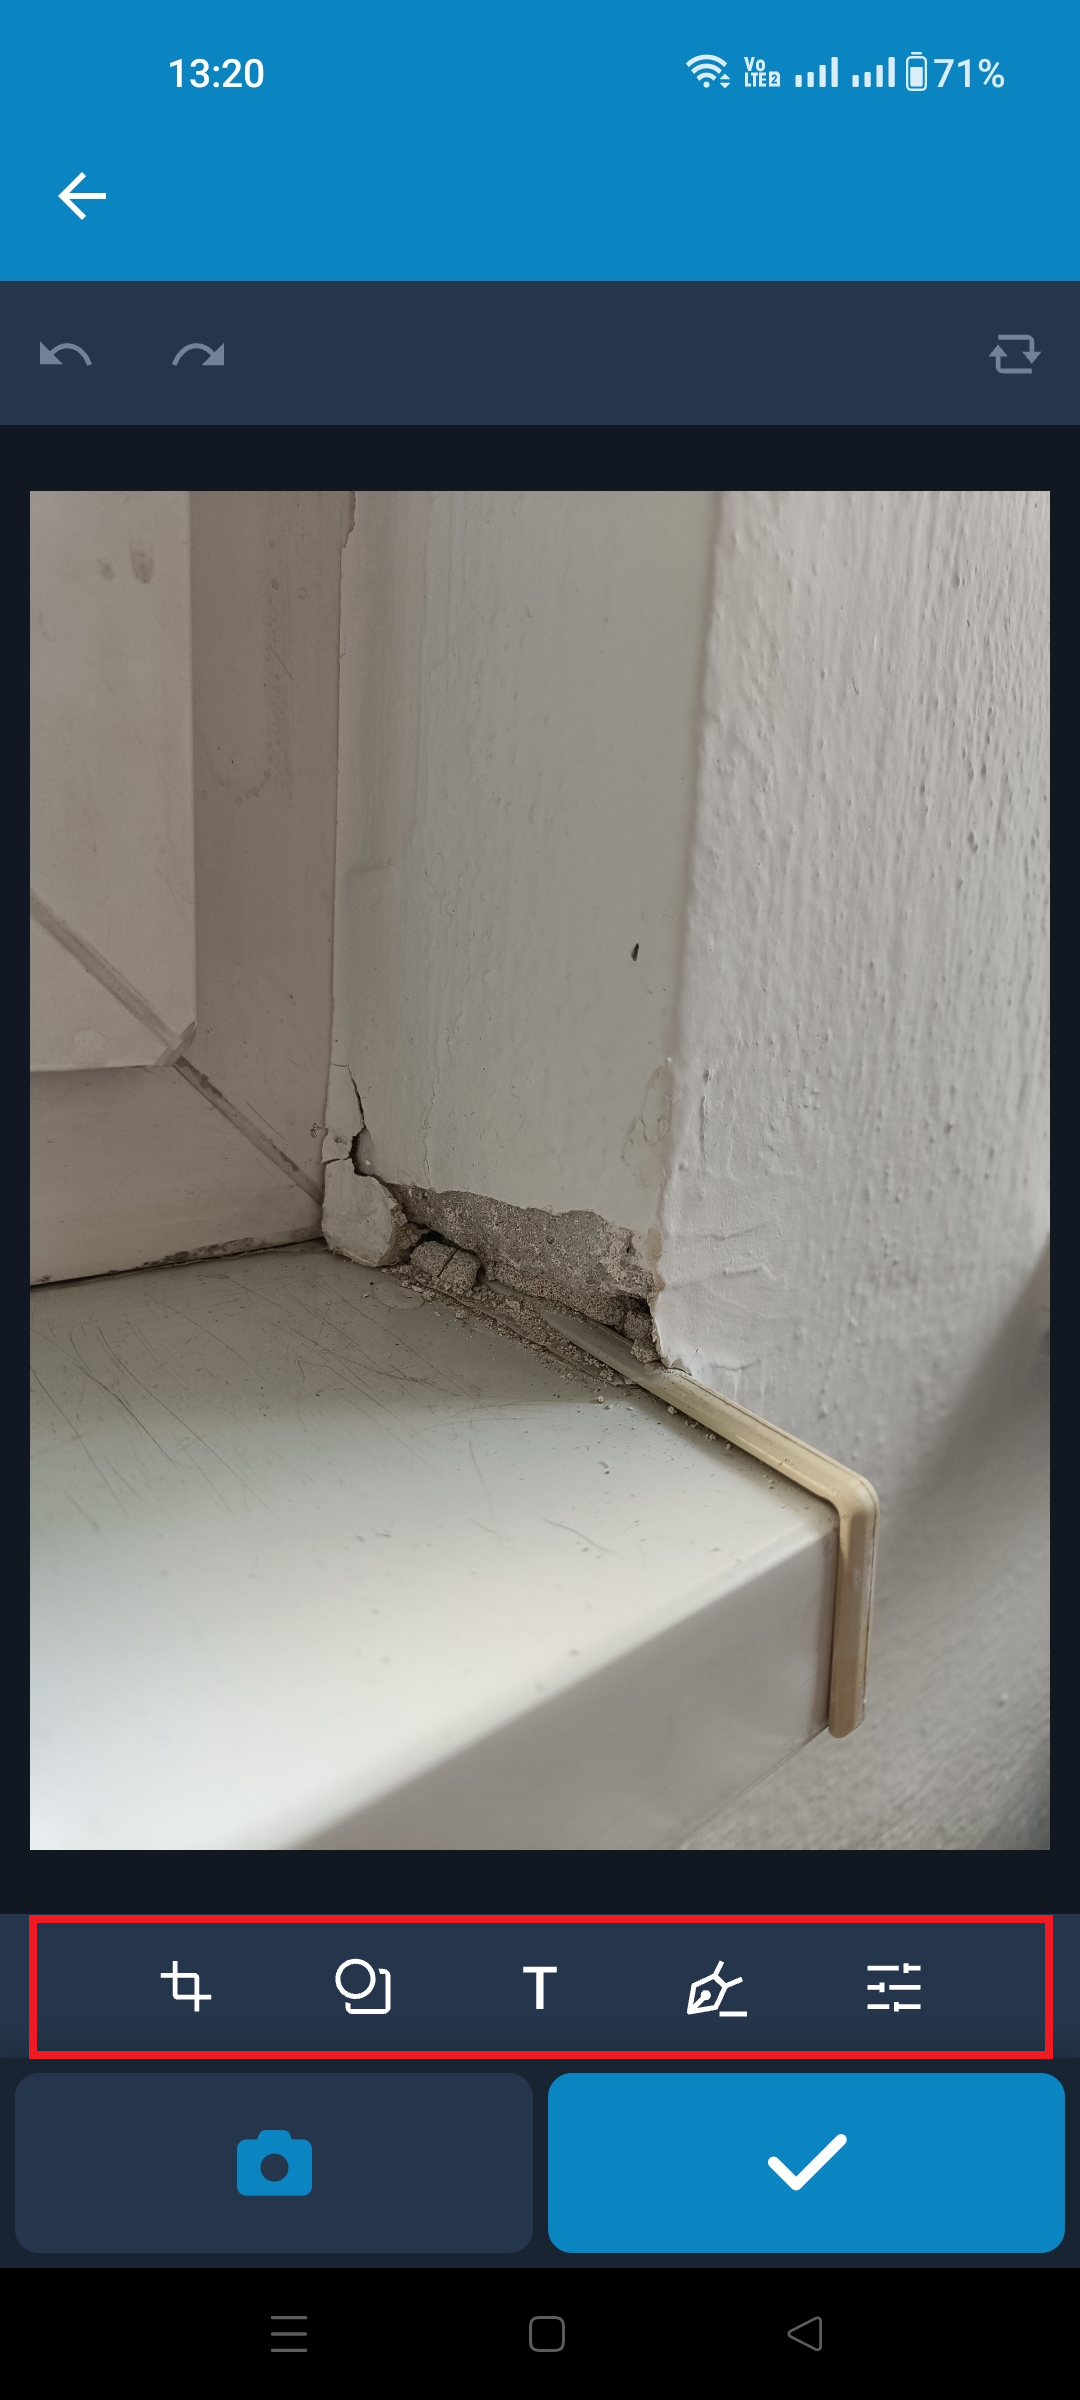
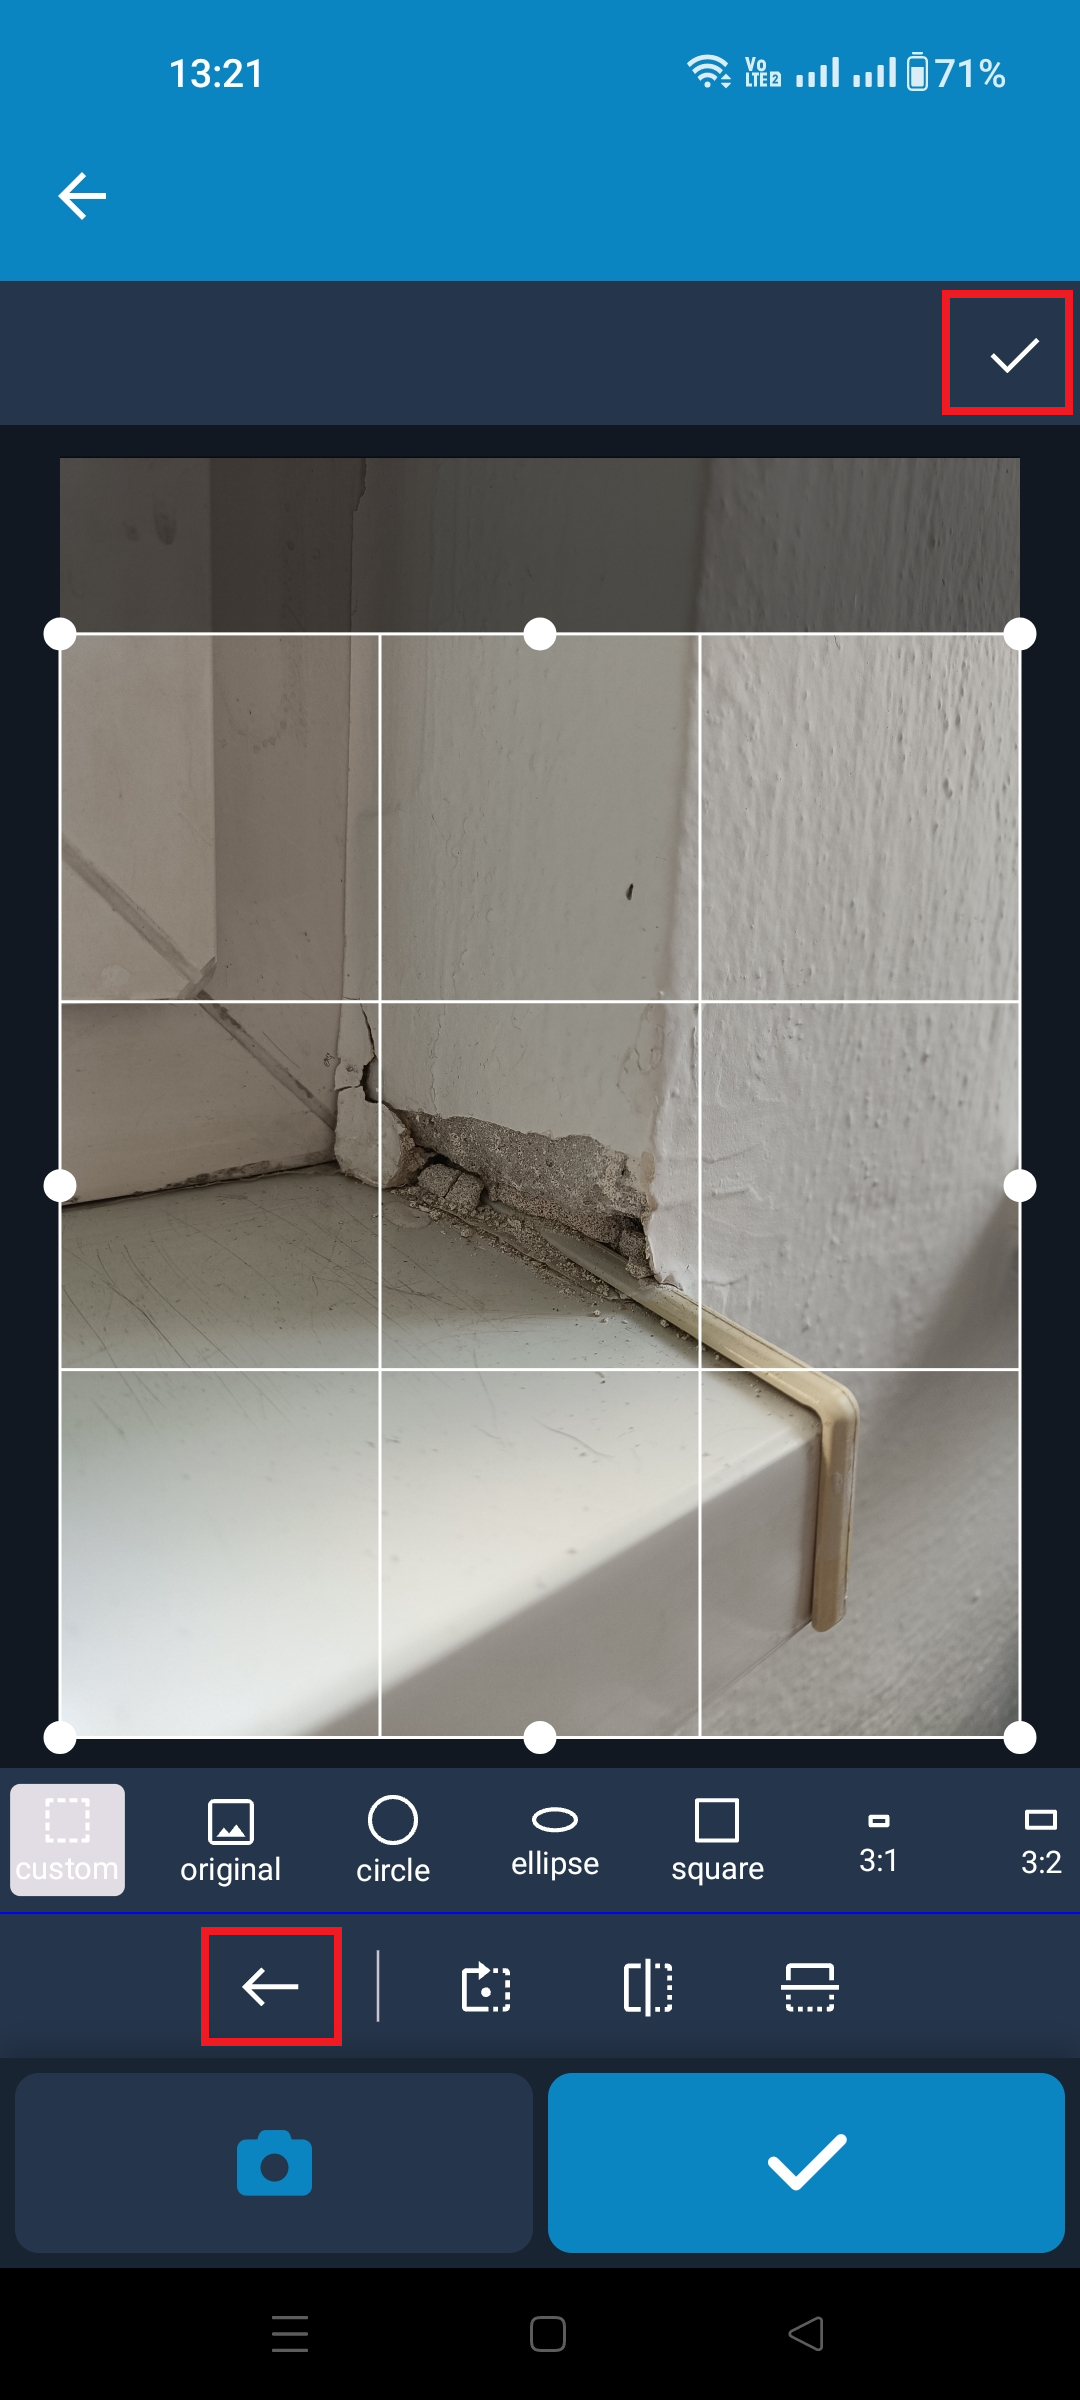
If the user decides to edit the photo before saving it, they can use the functions in the editing toolbar below the photo.
The options for the selected function then open in an expanded menu in the associated toolbar below the image.
After using the selected function, the user must confirm the change using the checkmark above the photo, and only then return to the editing options using the back arrow BELOW the image.
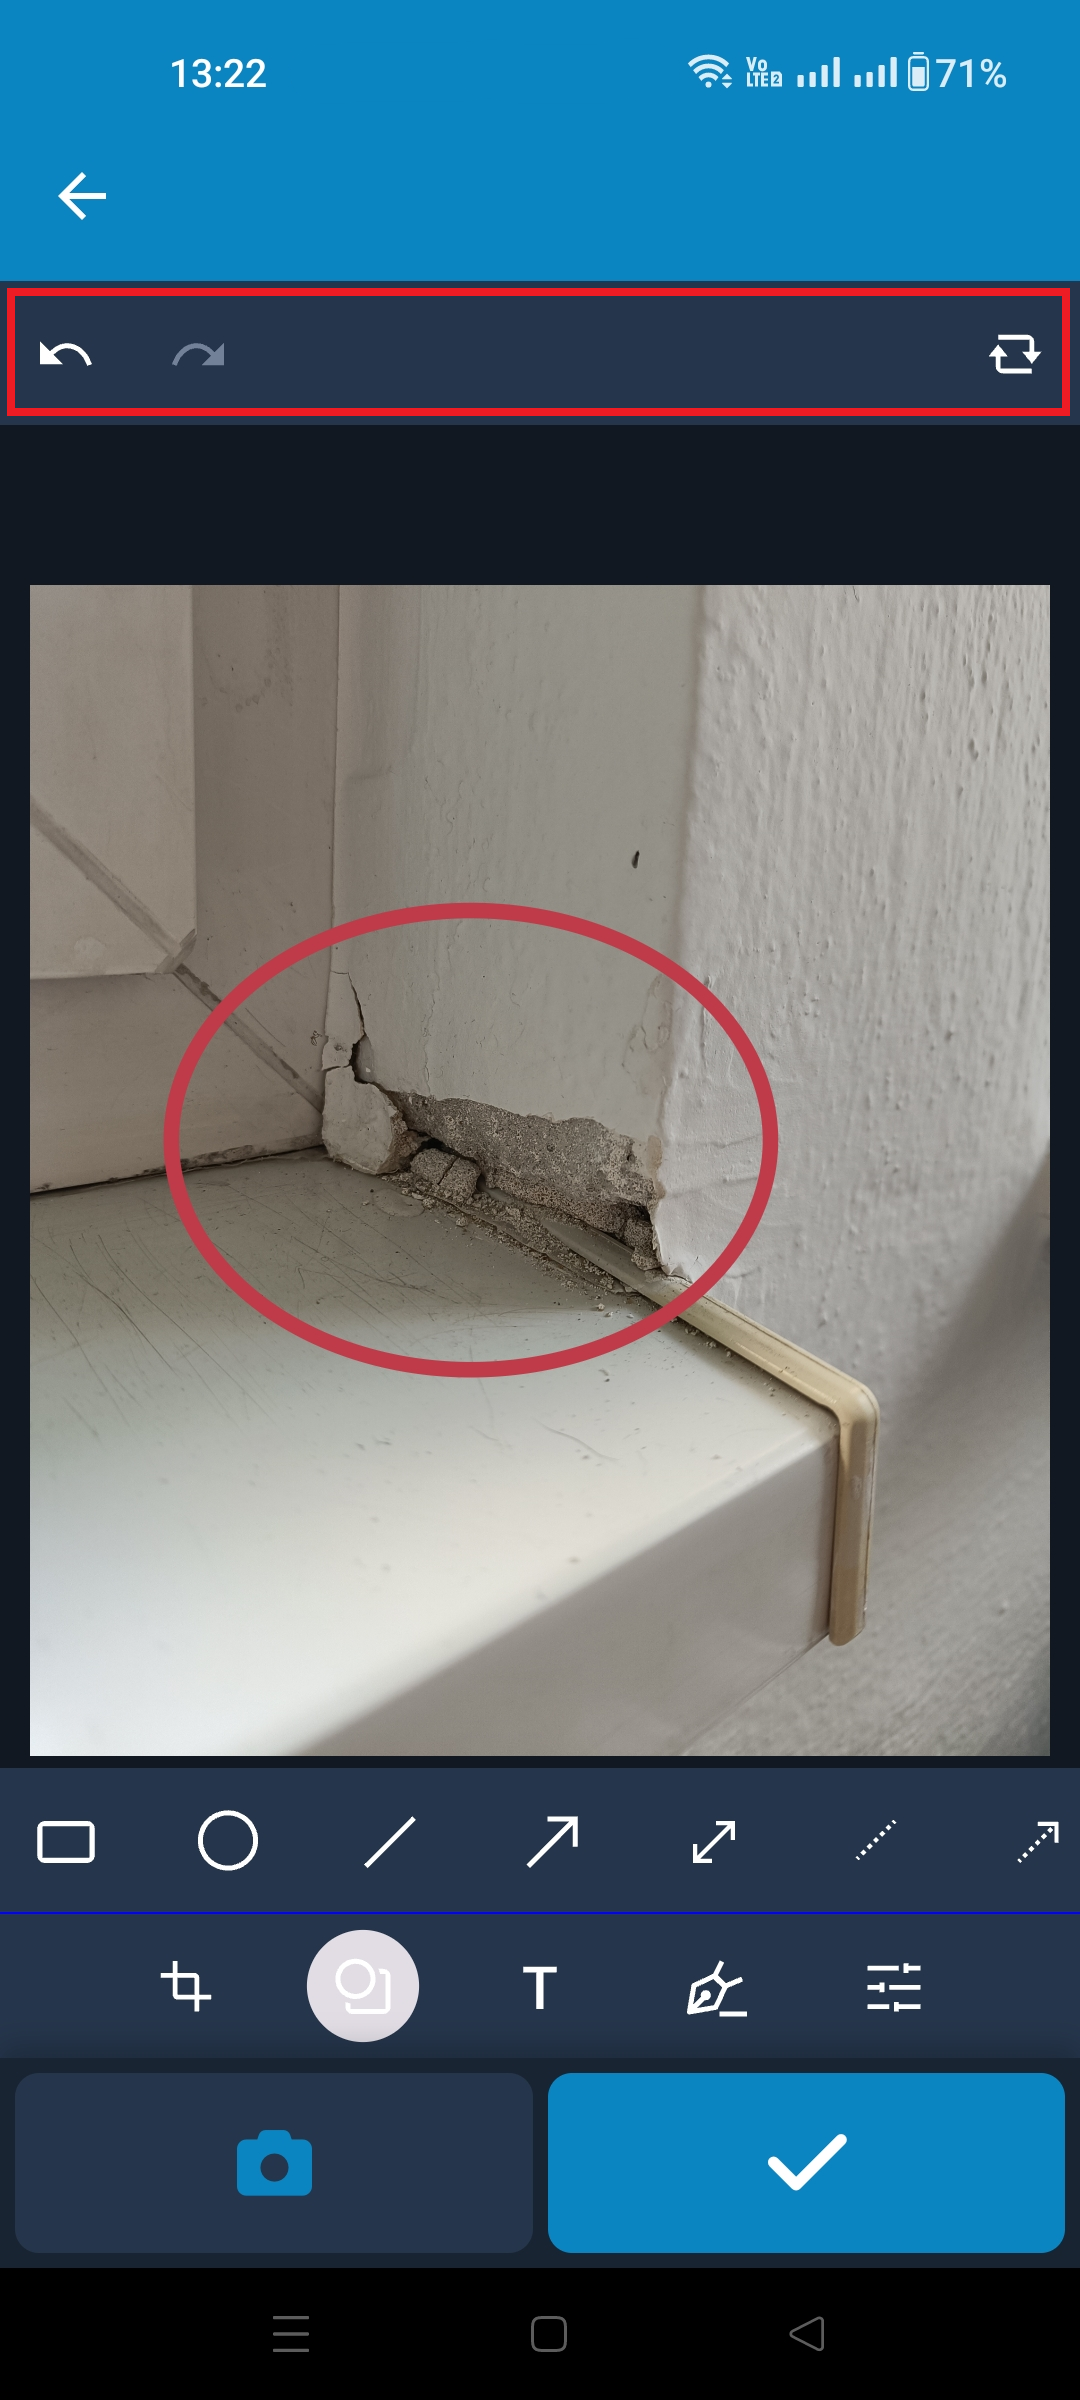
During editing, the author can return to previous steps using the arrows above the image, or restore the original version before editing using the icon above the image on the right → after using it, all changes to the image are deleted and the edited version cannot be restored.
Completing Ticket Creation
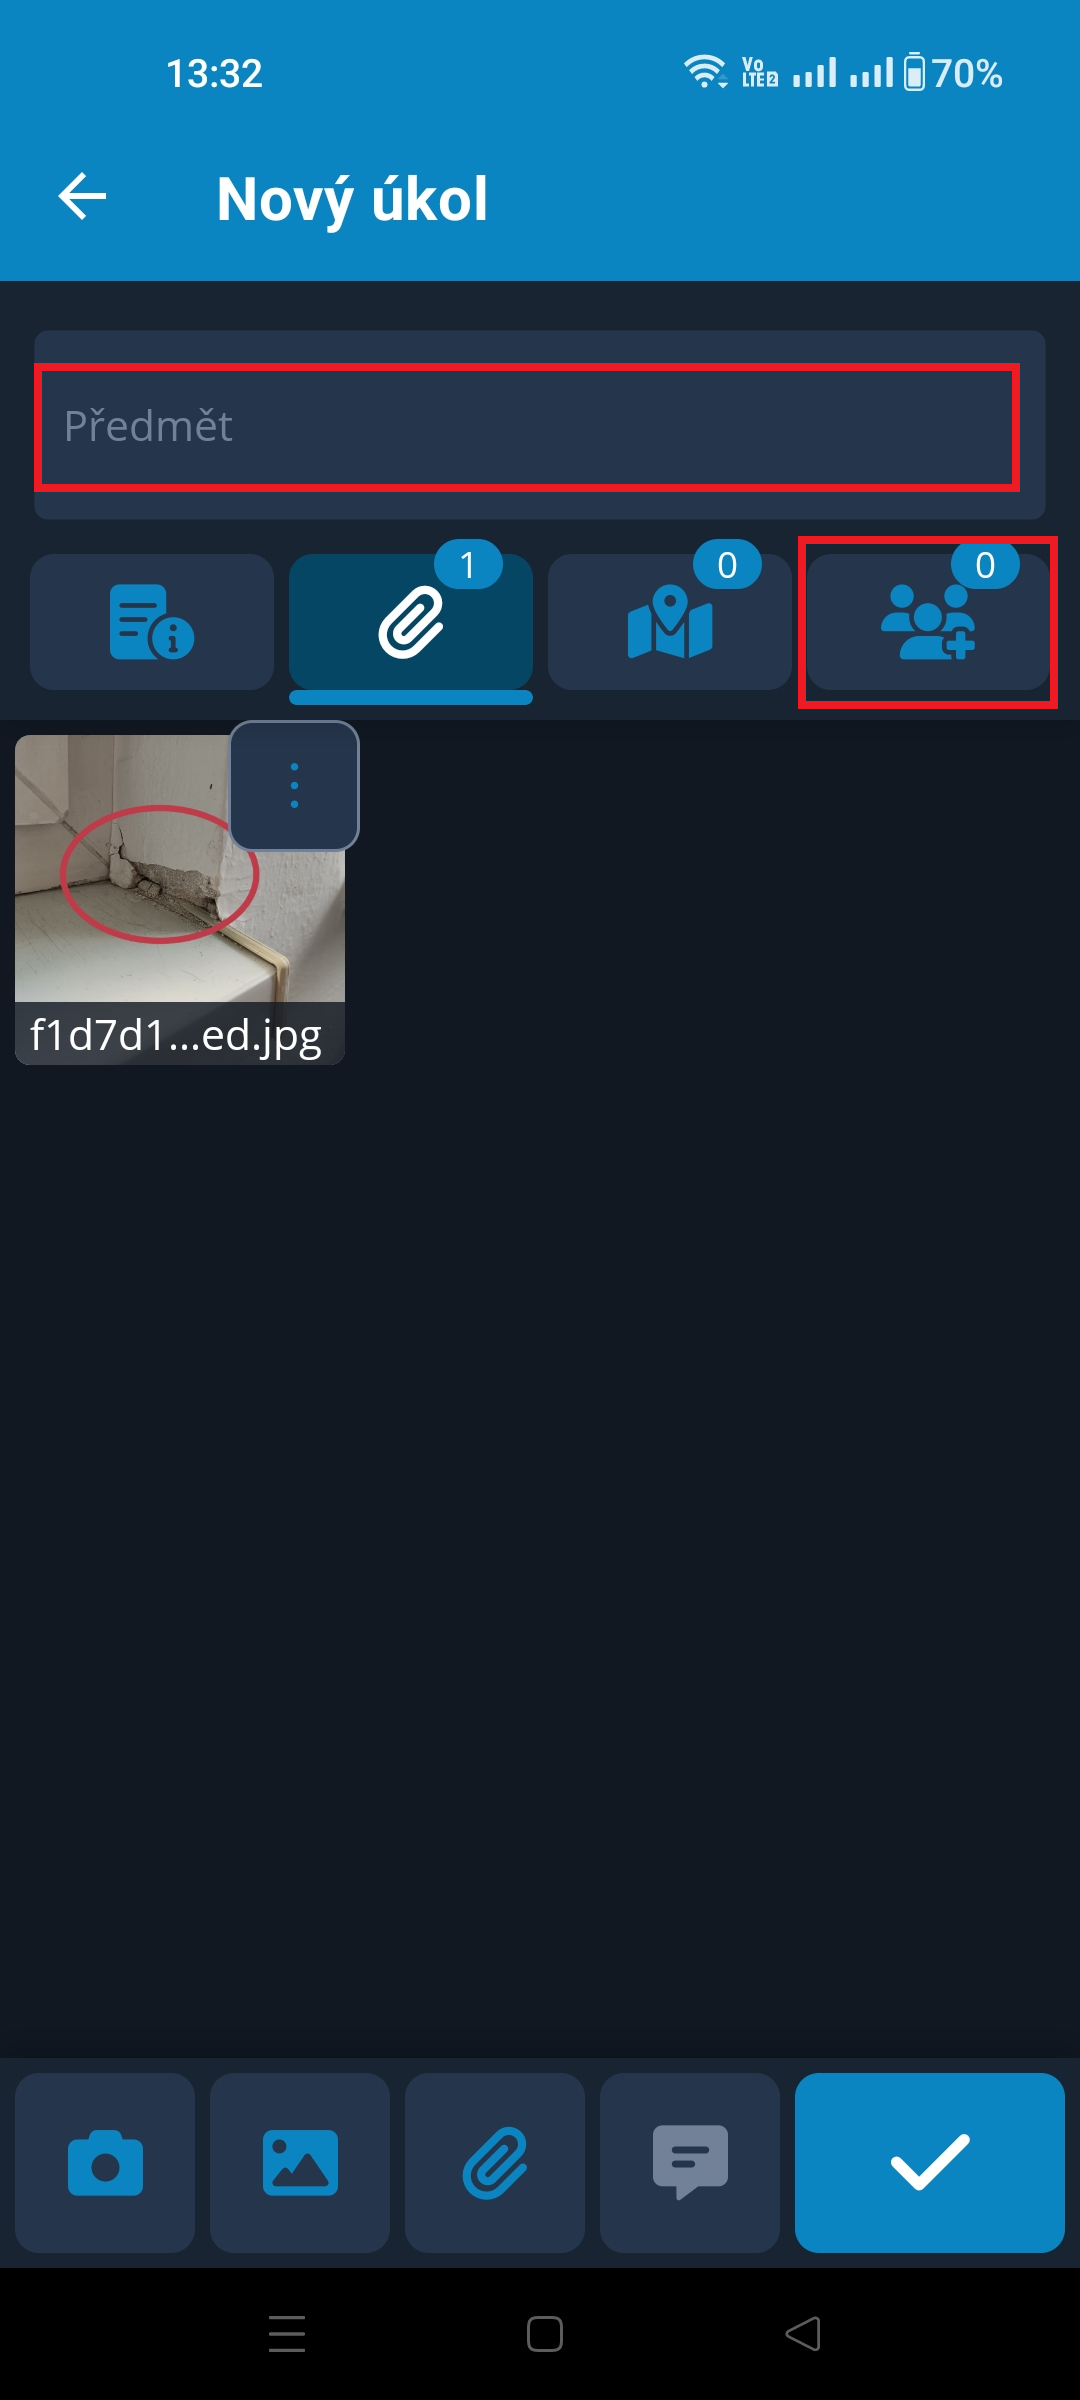
After the photo is saved, the application switches to the New Ticket form. The photo is automatically added to the Attachments section, and the author can enter the remaining ticket information.
The minimum required to save a ticket is the Ticket Subject and an assigned Assignee.
A description of all sections of the New Ticket form is provided above in the Standard Ticket Creation section.