
Table of Contents
Edit Ticket
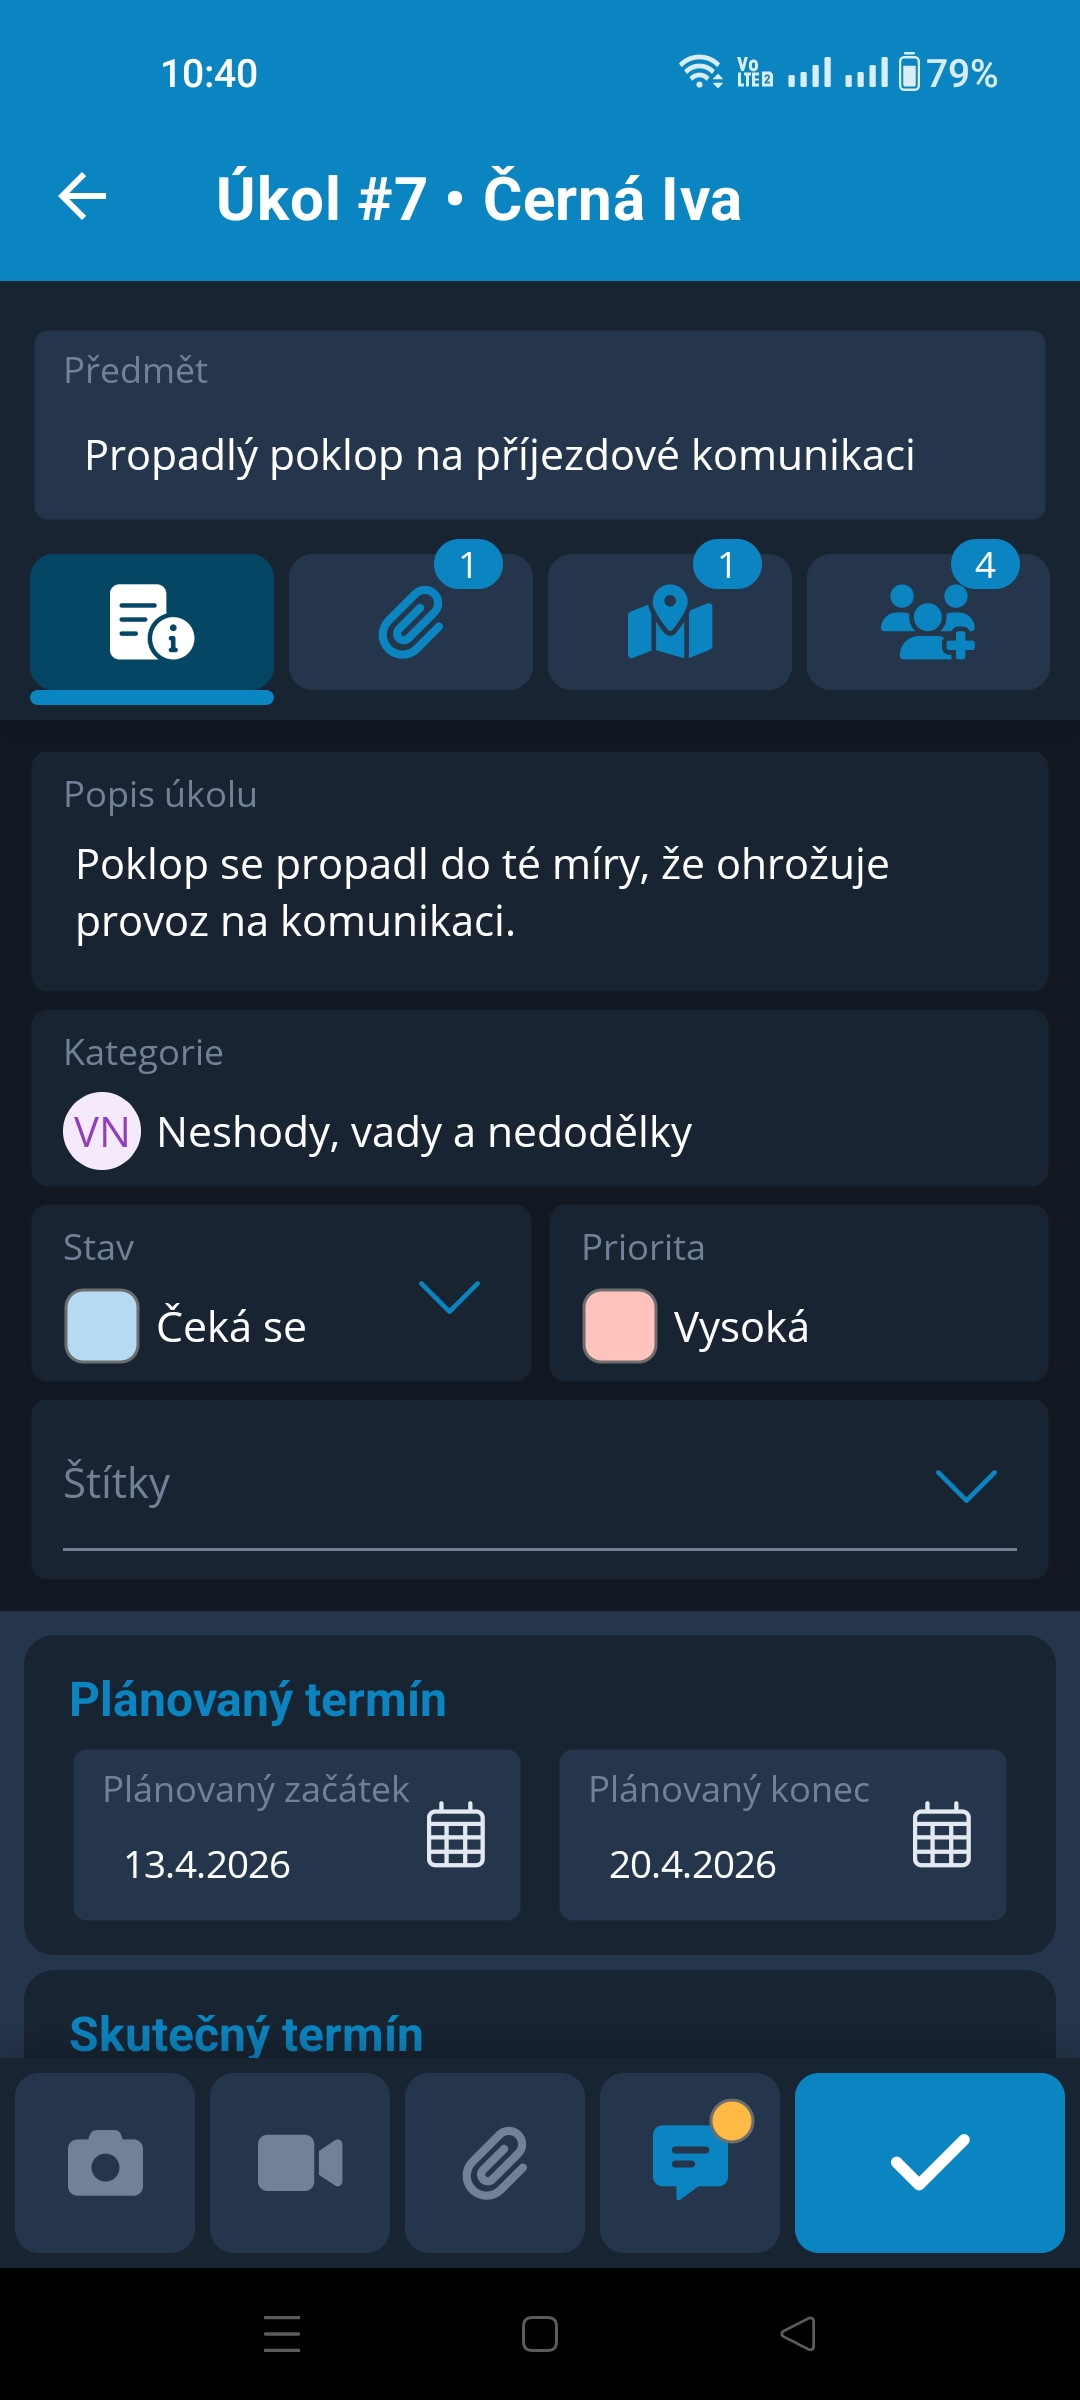
Edit Ticket is accessible from the Ticket List by tapping the ticket Subject field. This opens the Ticket Details form.
Users can only edit information allowed by their permissions.
Permissions for ticket participants are set as follows:
- Ticket Author → has the fewest restrictions and can essentially edit everything, including the ability to delete the ticket.
- Approver → can edit the status and labels, add attachments, edit drawings and the map, change participants, and add Statements.
- Assignee → can edit only the status and labels and add Statements. Other data is available for viewing or downloading (attachments).
Permissions resulting from the user's assigned role on the project primarily determine which tickets the user is allowed to see and which restrictions apply.
The exception is the Administrator role. This role allows the user to edit everything except participating in the Discussion. However, if the Administrator is also a ticket participant in any capacity (Author / Assignee / Approver), they can participate in the Discussion.
The actual start / end date can never be edited. These dates are automatically filled in by the application based on the actual progress.
In the bottom icon bar, there is an icon for accessing the Statement for the ticket. If there is an orange dot next to it, this means that the Statement contains one or more records. An icon without a dot indicates that it contains no records:


Tapping this icon opens the Statement. If the user has the required permission, they can add a record, as described below.
Statement for the Ticket
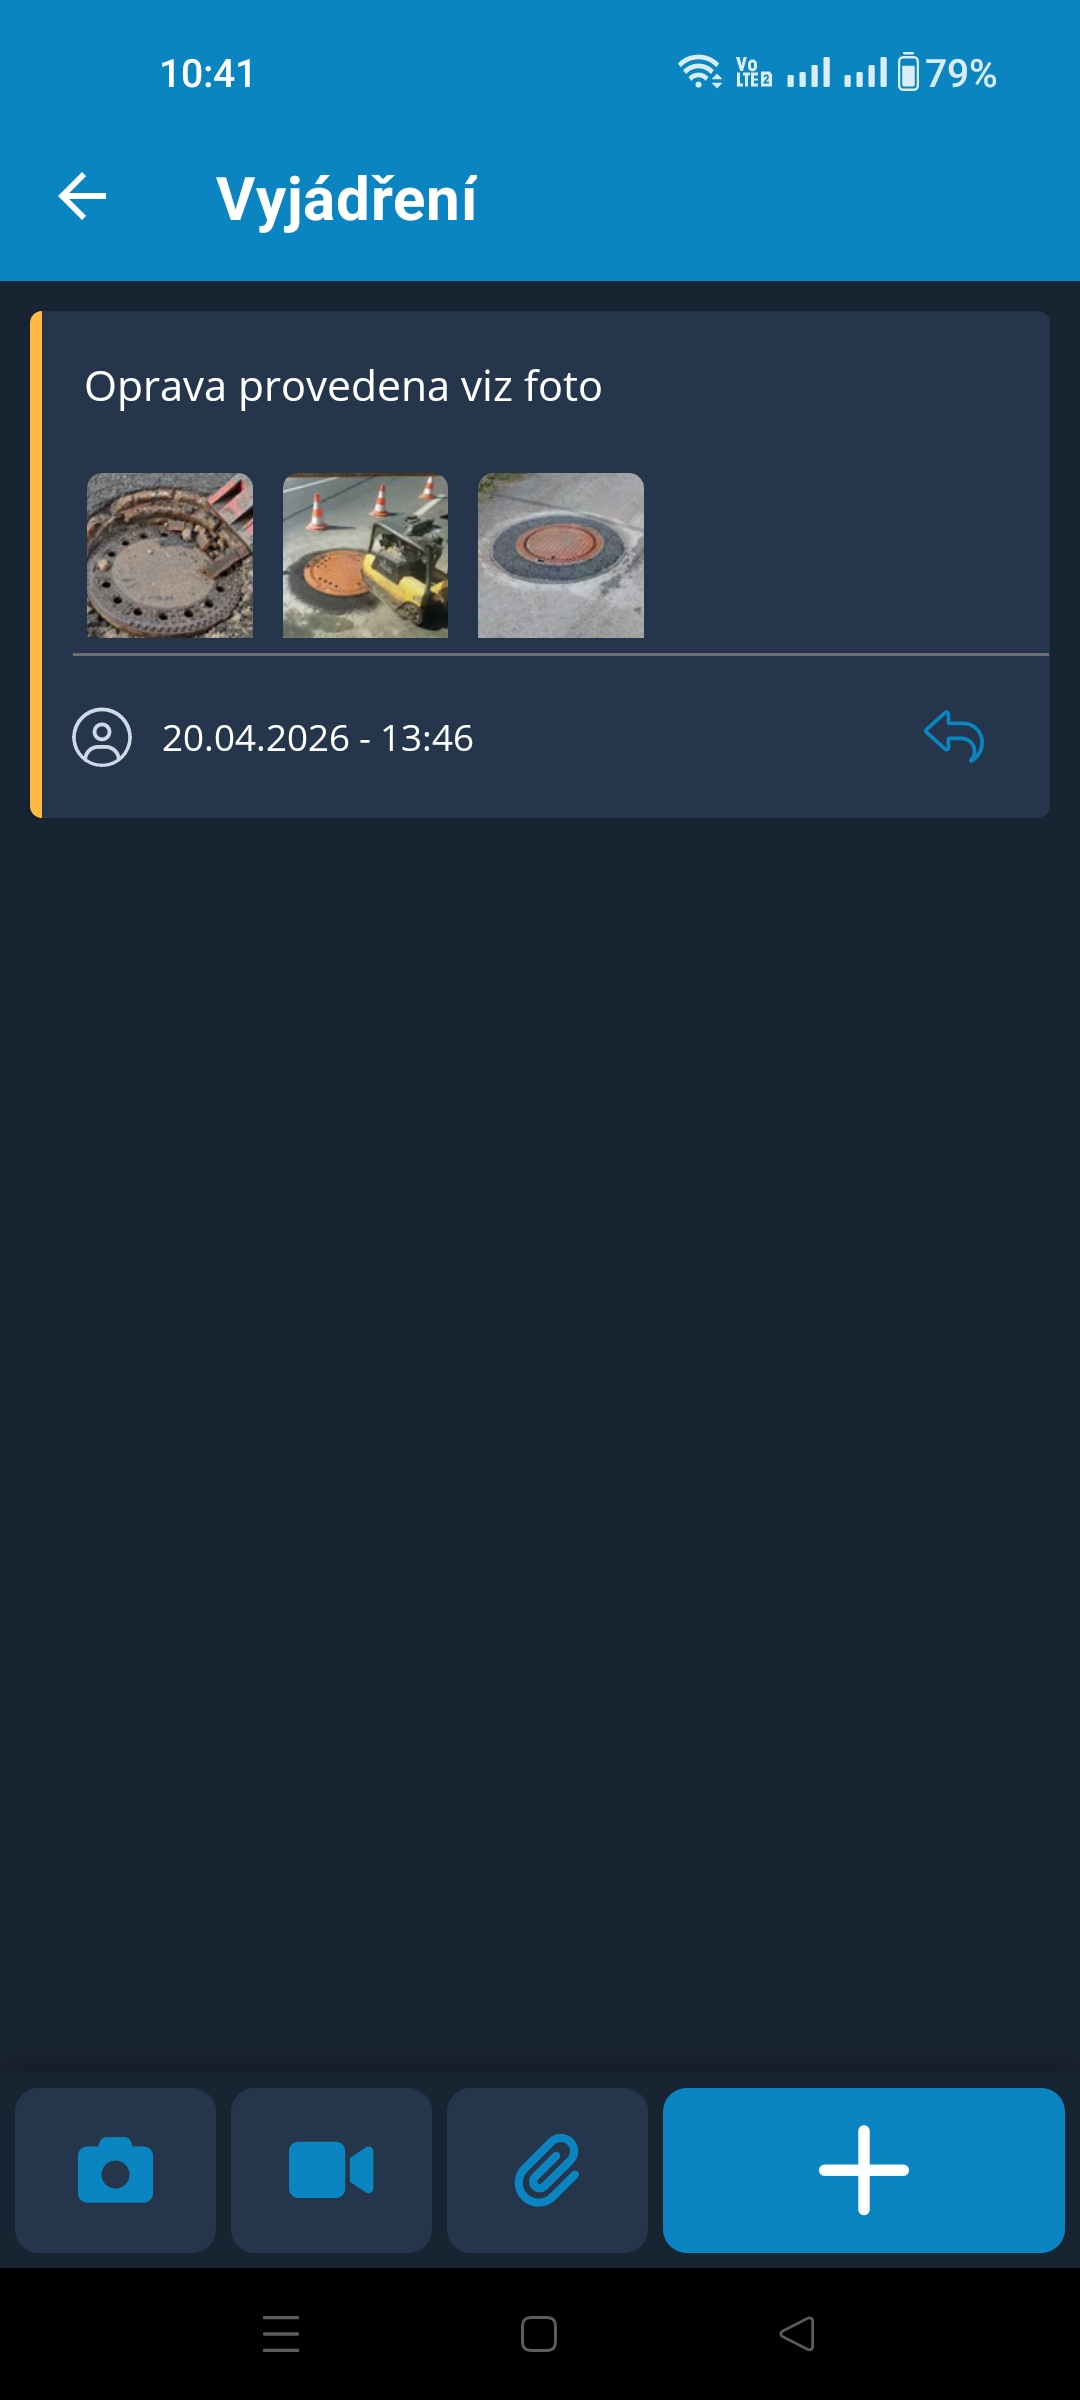
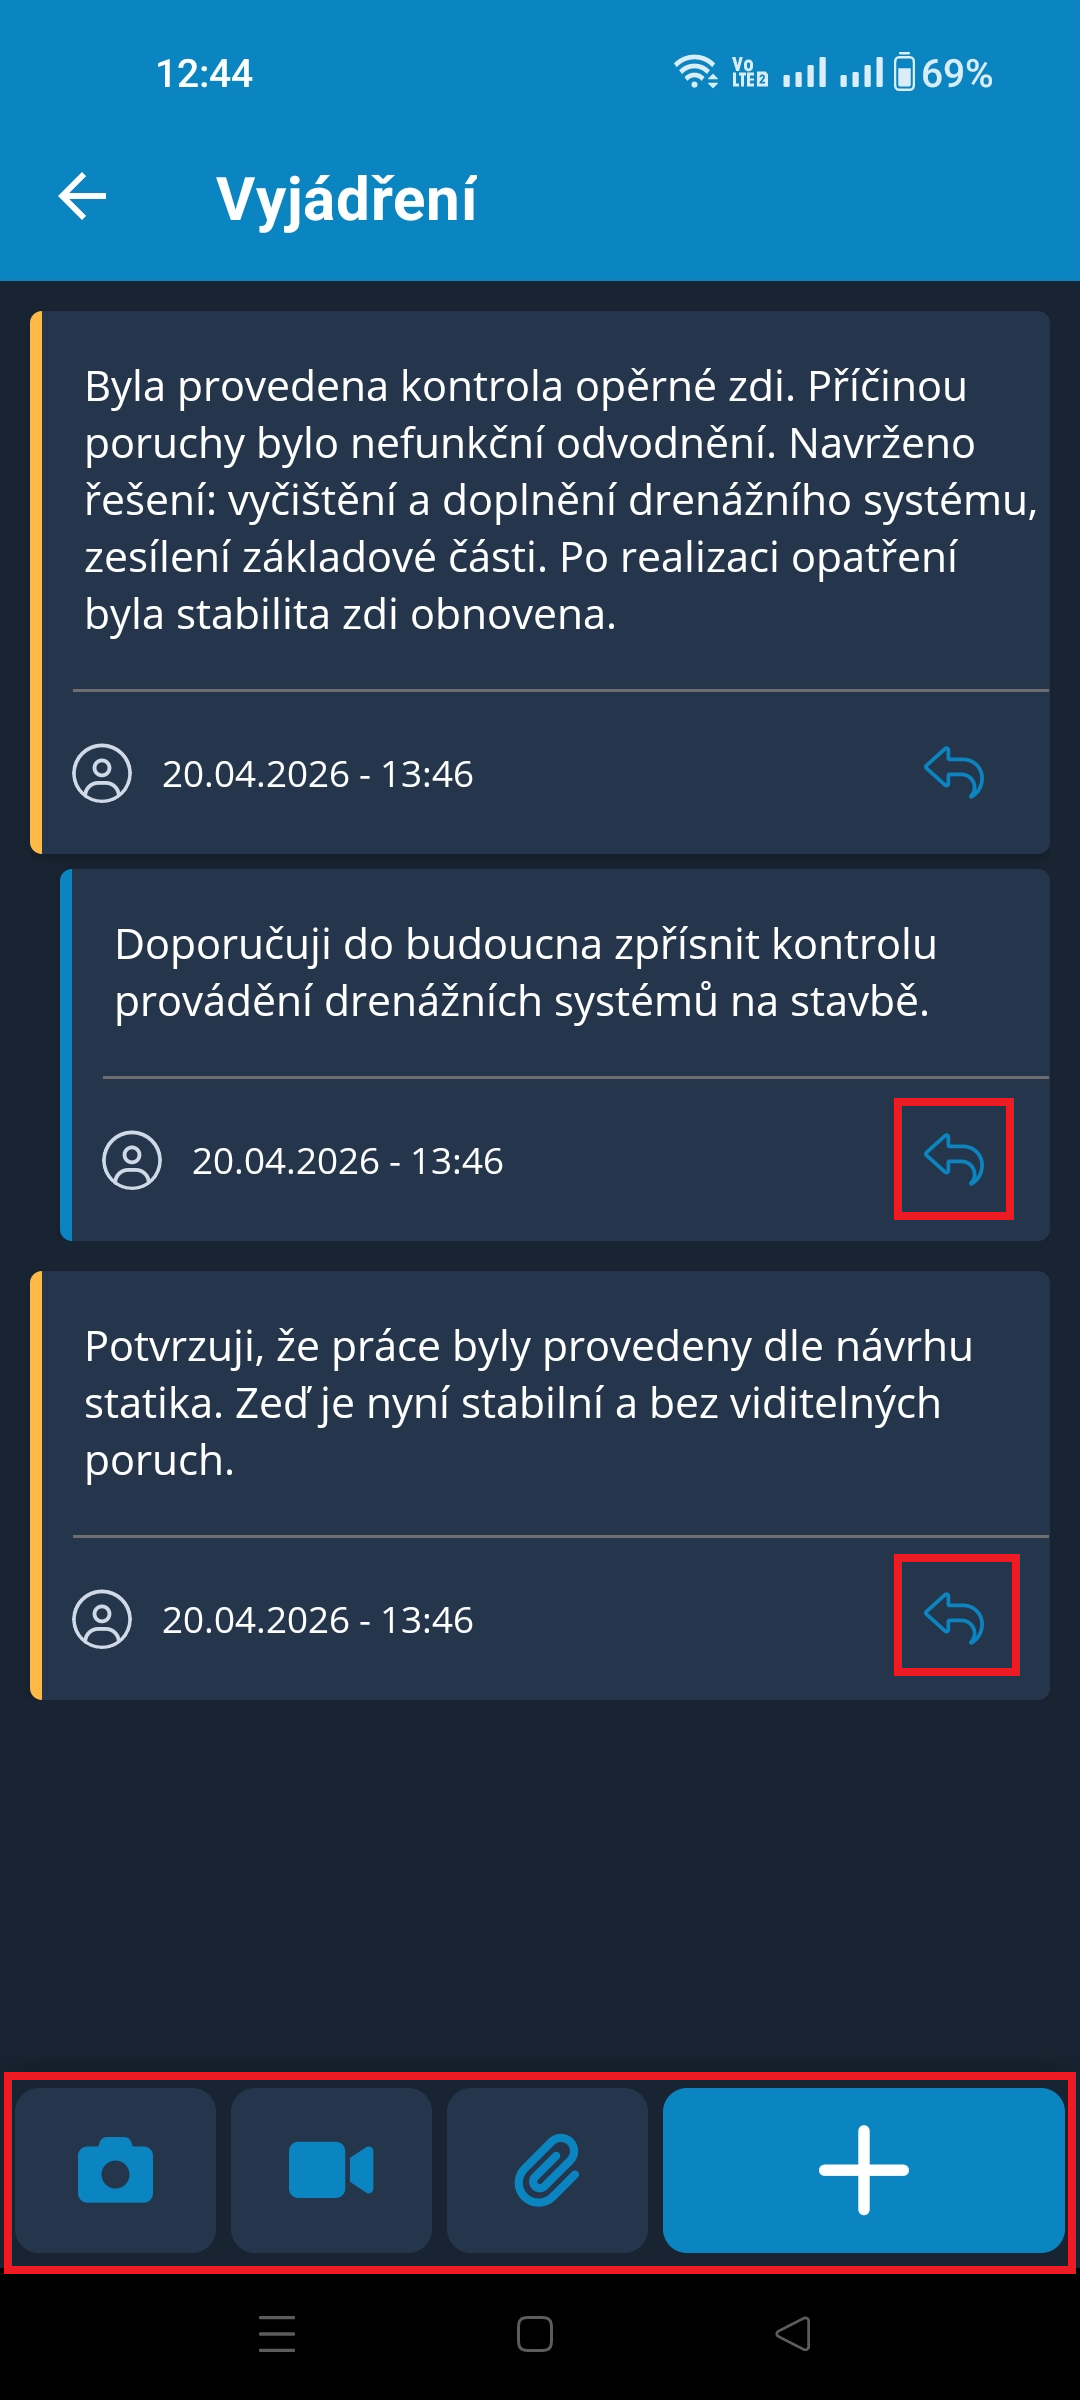
All ticket participants can participate in the Statement. New threads can be created and responses can be added to existing threads.
To create a new thread, the user taps the + icon in the bottom icon bar.
To add a response, the user taps the Respond icon in the bottom-right corner of the post they want to respond to. The response is then added below the original post.
Attachments can be added to records. The new record window has a bottom icon bar that allows the user to use the camera to take an immediate photo for the record or the device storage to select the relevant file.
The author of a record can edit or delete their record, but only until someone responds to it. Once a response is added, editing and deletion are locked.
Attachment Editing
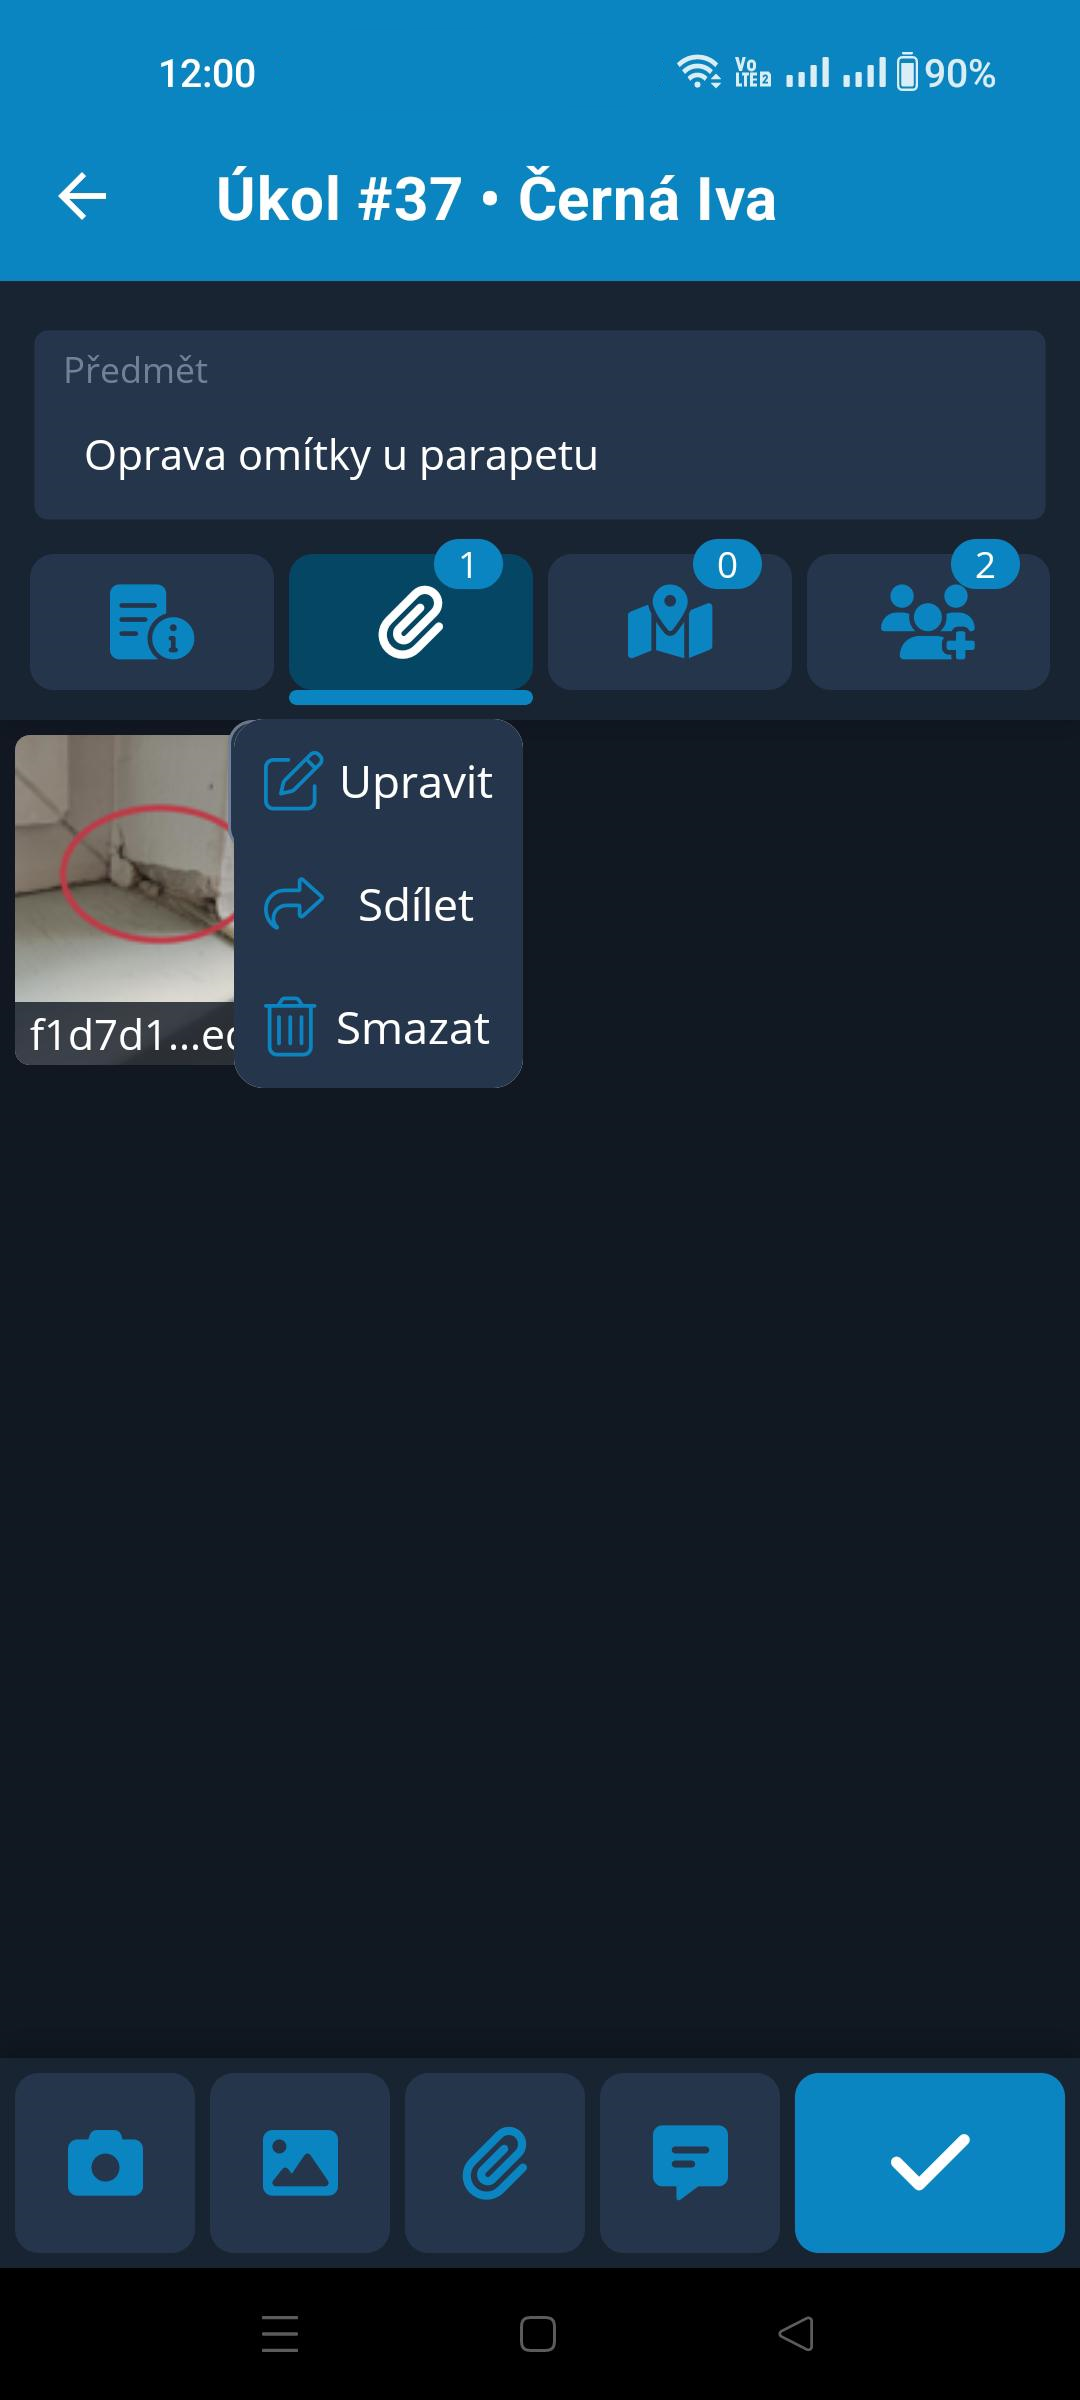
In the top-right corner of each attachment, there is a vertical Three-Dot Menu. Tapping it opens the attachment menu available according to the user's permissions:
Share is the only option available to everyone. This option displays the apps available on the device for sharing, allowing the user to share the individual attachment with their contacts.
Only the author of the attachment can Delete it.
Edit is available only for image attachments and is also available only to their author. This option moves the image into editing mode, as described below.
Editing an Image Attachment
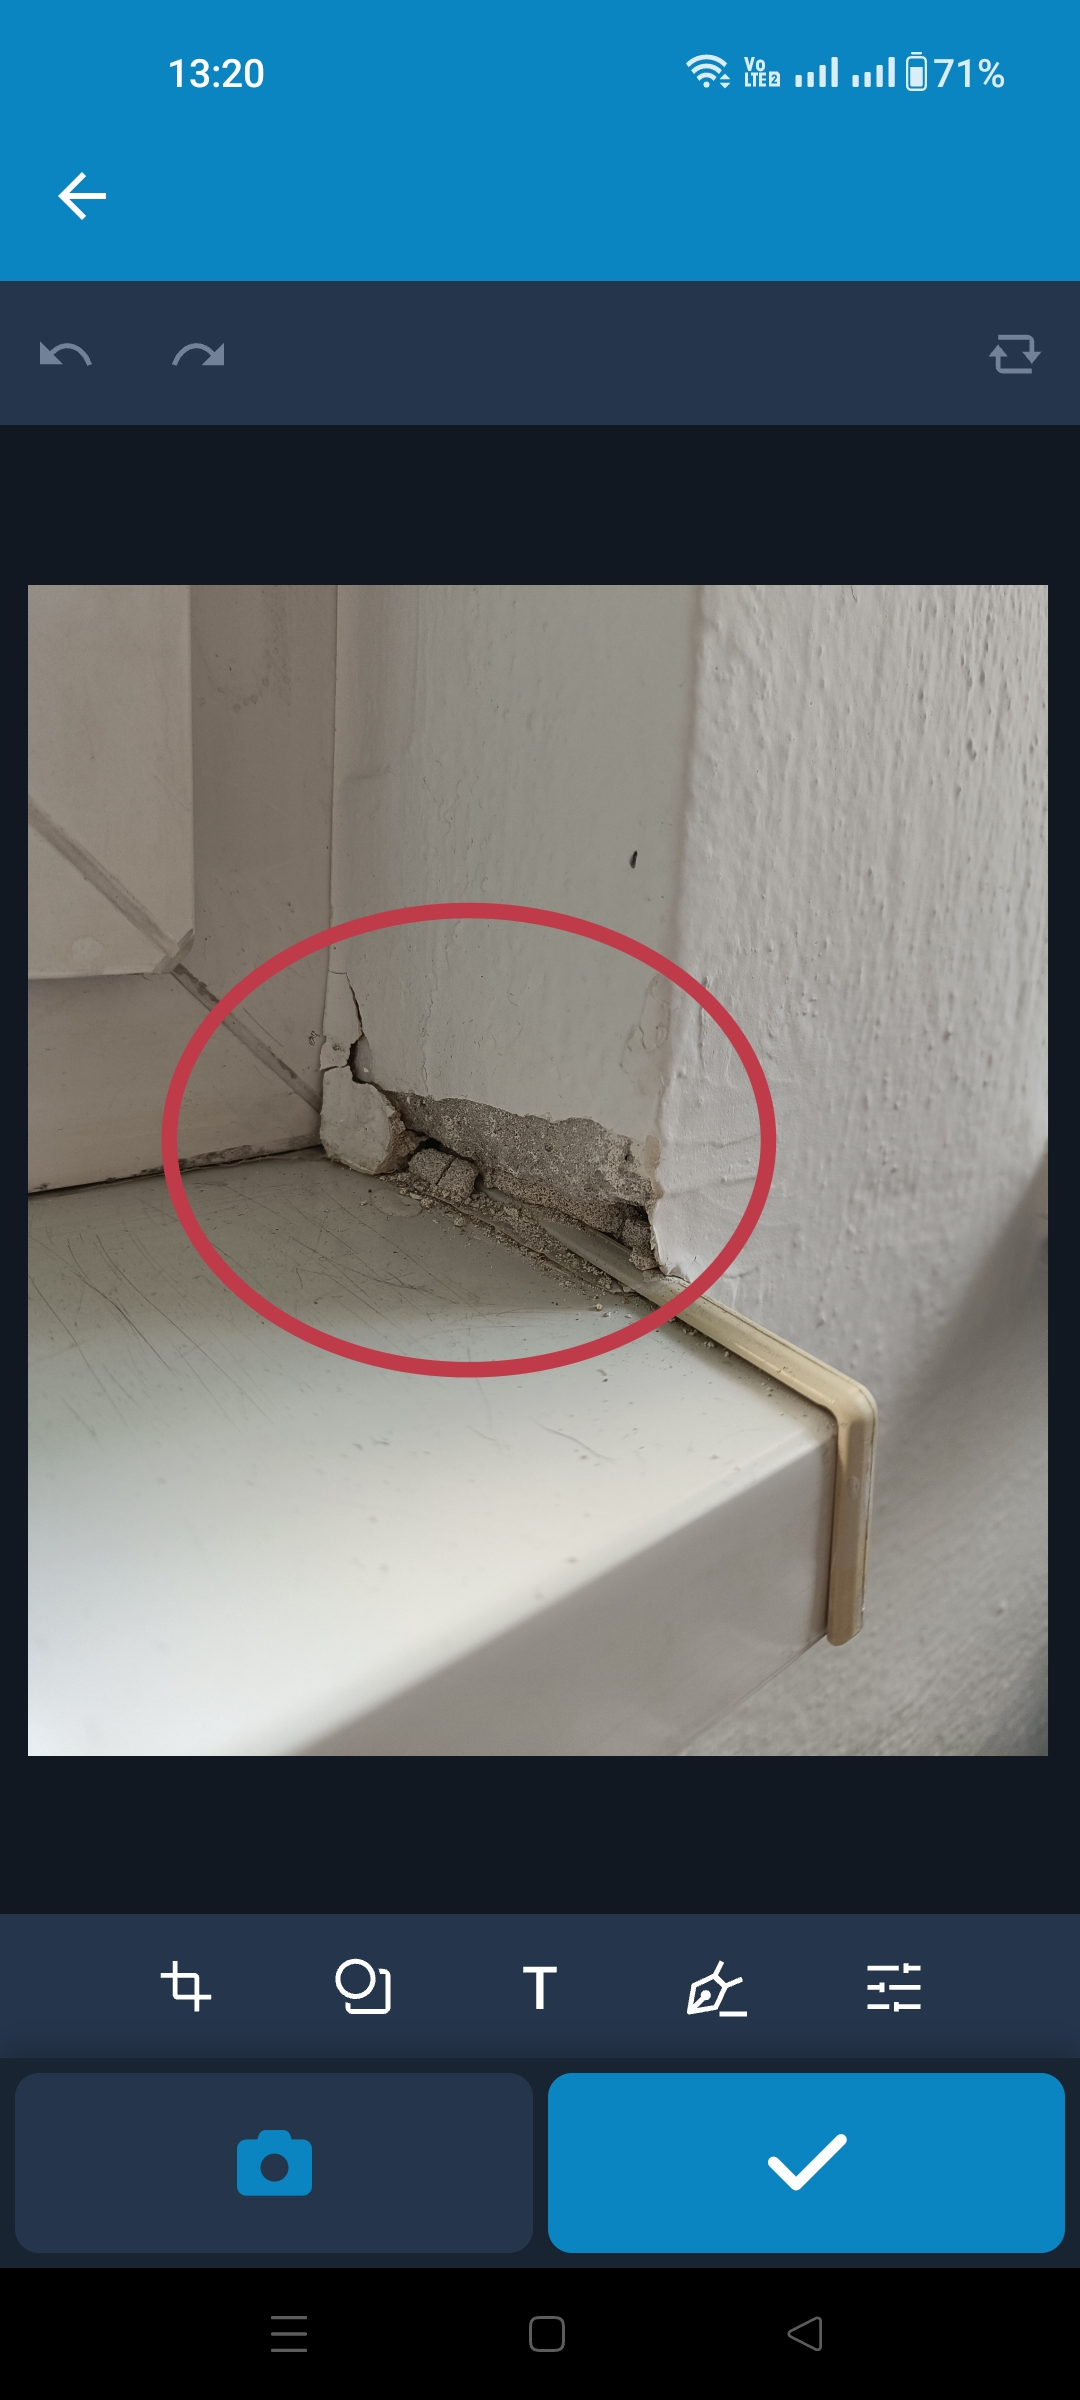
Editing is performed using the functions in the editing toolbar below the photo. Available functions include:
- various cropping modes, rotation, and mirroring
- inserting shapes, curves, arrows, etc., including options for line color and thickness
- inserting text, including options for color, font, etc.
- pen mode, including options for line color and thickness
- adjusting photo properties such as brightness, contrast, sharpness, etc.
Saving the changes and returning to the ticket is done by tapping the confirmation icon  in the bottom-right corner.
To return to the ticket without saving the changes, tap the back arrow in the top blue bar of the screen.
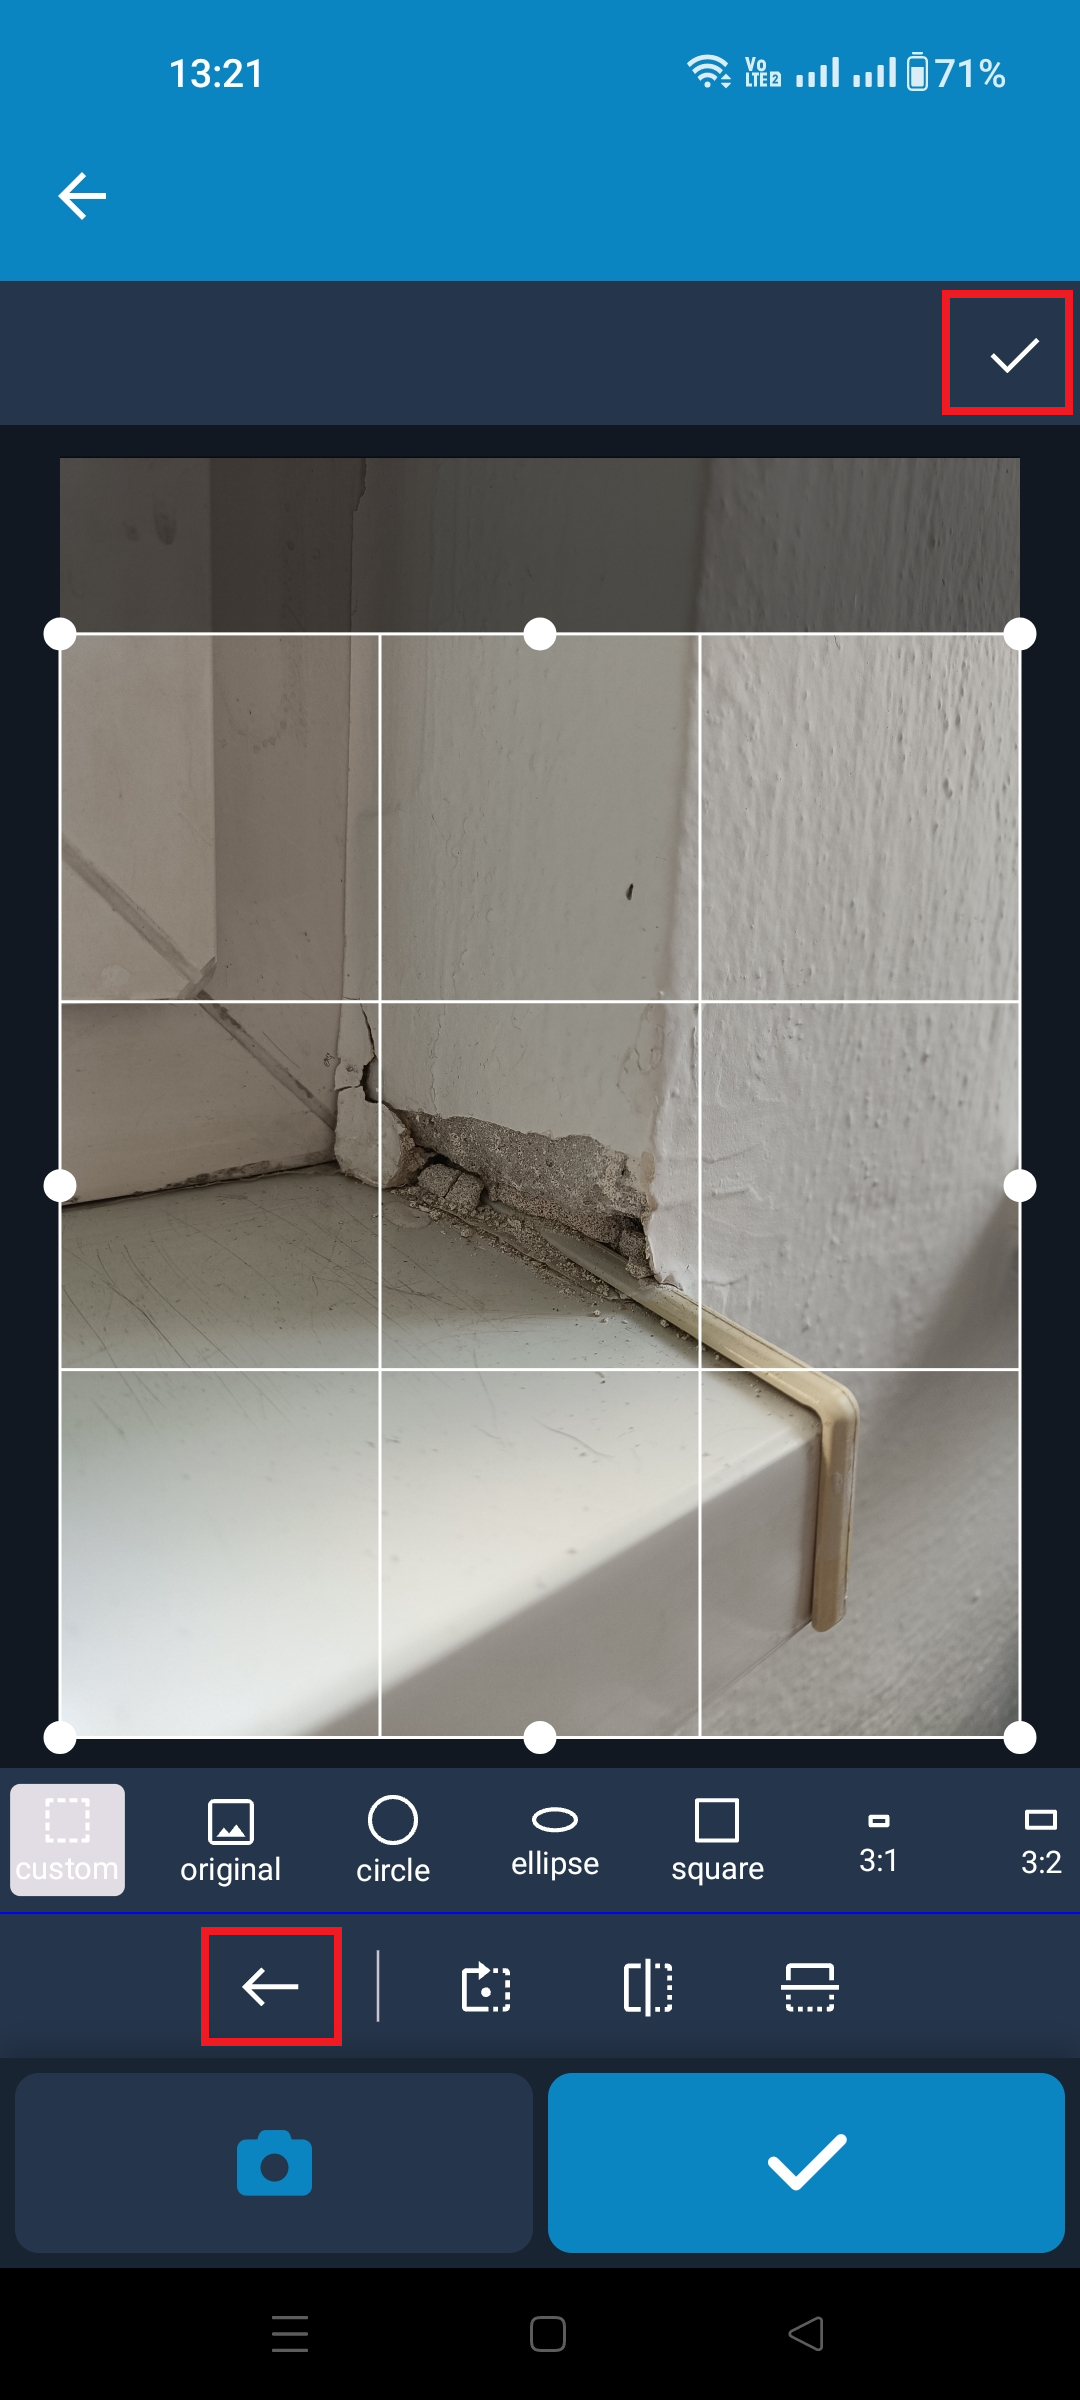
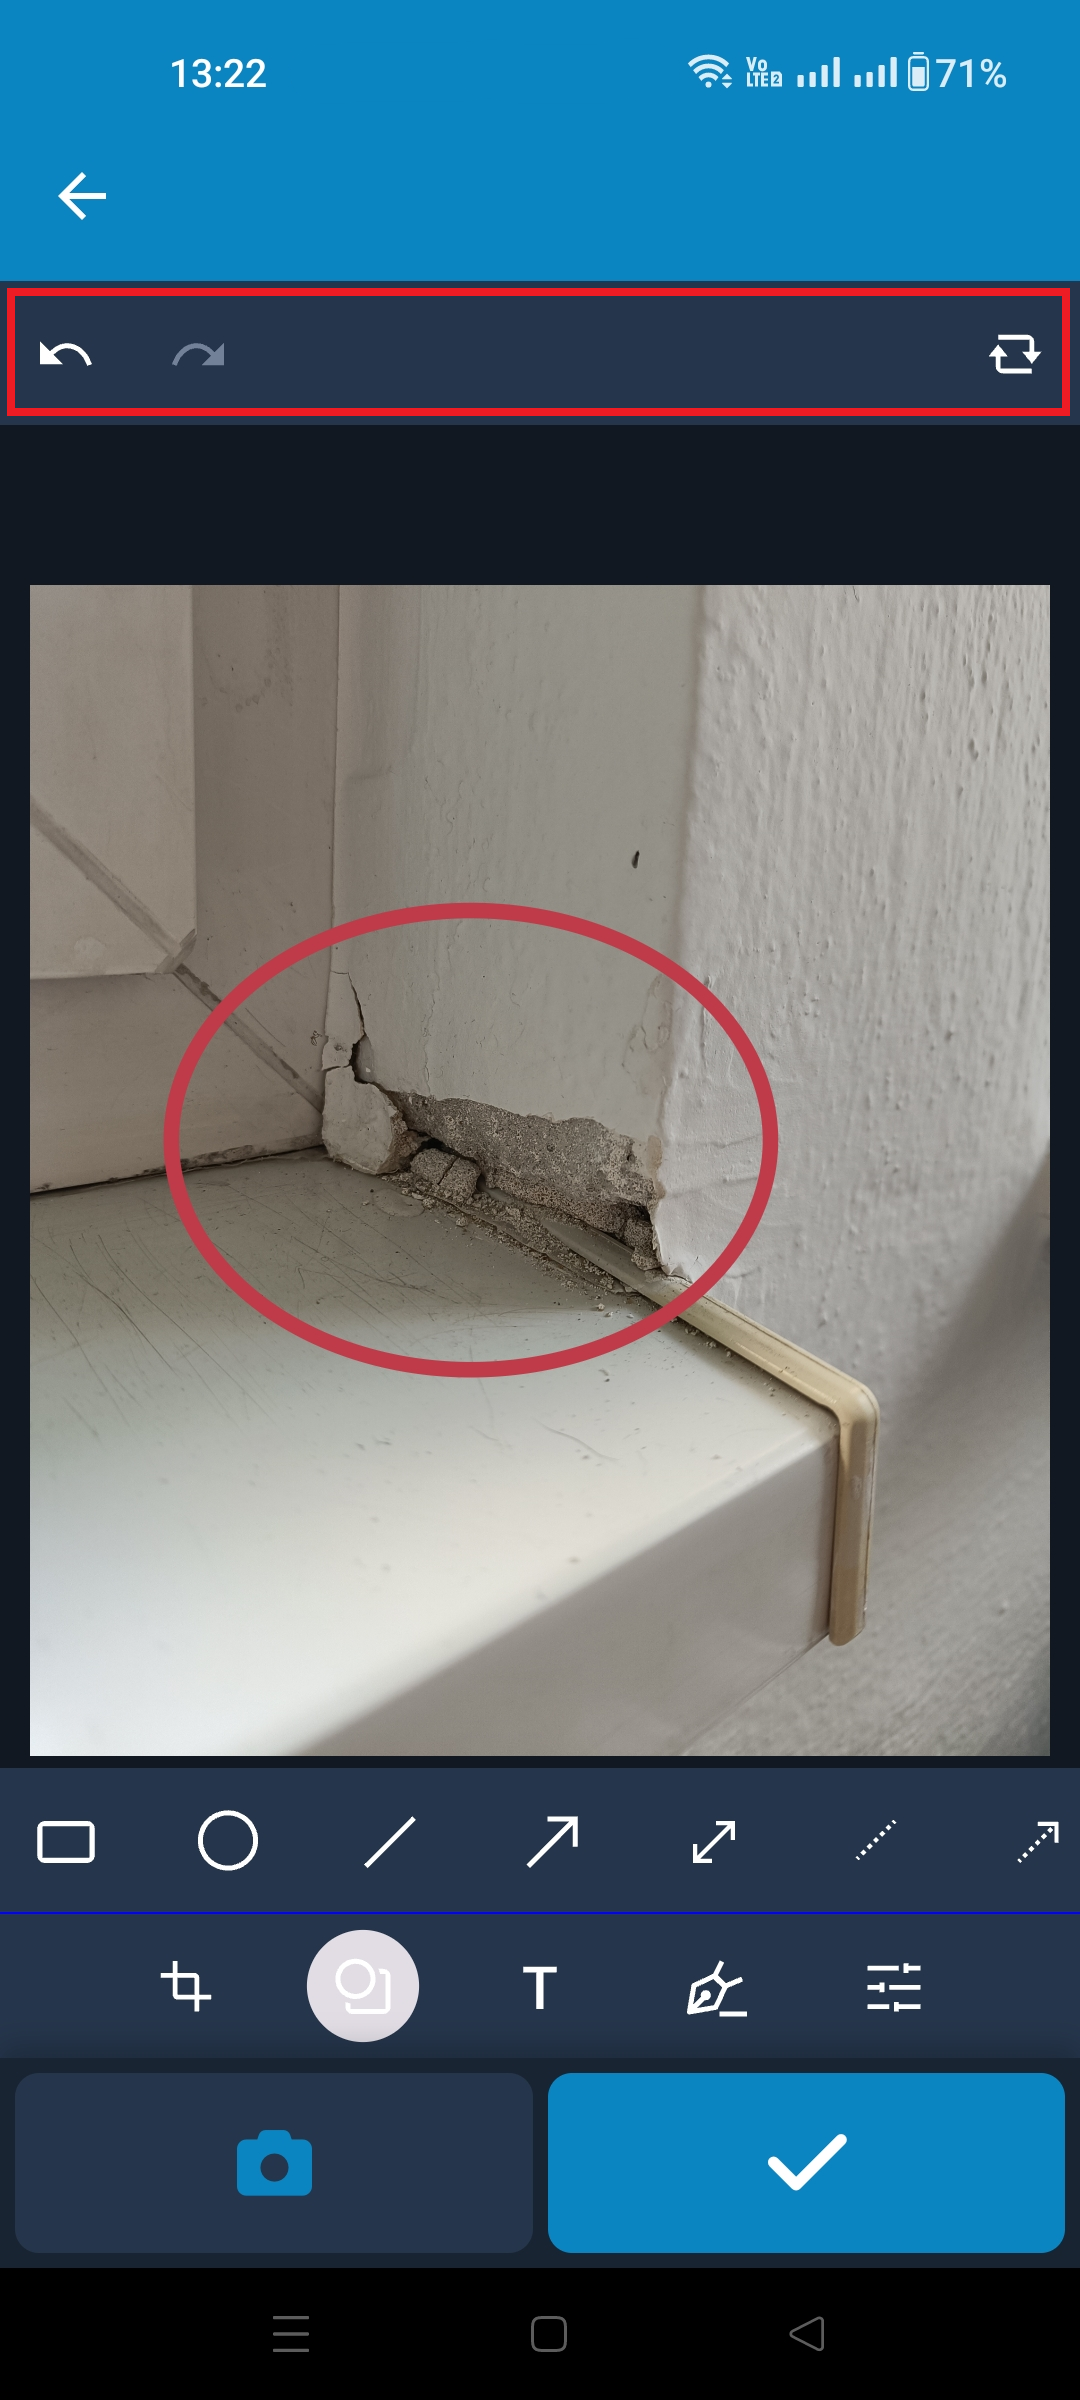
After selecting an editing function, its options open in an expanded menu in the associated toolbar below the image.
After using EACH selected function, the user must confirm the change using the checkmark above the photo, and only then return to the editing options using the back arrow BELOW the image. If the user does not confirm the change and returns to the editing options, the change will not be saved.
During editing, the author can return to previous steps using the arrows above the image, or restore the original version before editing using the icon above the image on the right → after using it, all changes to the image are deleted and the edited version cannot be restored.
Saving the changes and returning to the ticket is done by tapping the confirmation icon in the bottom-right corner.