Obsah
Project Settings
For the module to be used, a project must first be created in Buildary and the Ticket Management module must be activated (enabled) for it. Modules can be combined in different ways on a project, and individual modules can be activated or deactivated at any time during the project as needed. However, at least one module must always be active on a project. Buildary currently offers three modules:
- Project Diary
- Ticket Management
- Performed Works
The number of activated modules affects the price (see the online price list).
The procedure for creating a new project in Buildary is described in Creating a Project.
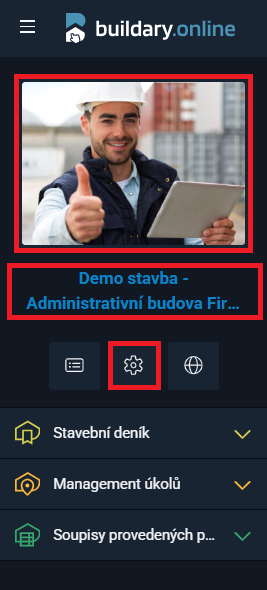
You can access PROJECT SETTINGS either from the Project List by clicking the  icon next to the relevant project, or, if the project is already open, from the left navigation panel by clicking:
- the project image, or
- the blue project name below it, or
- the icon
 below the project name.
Administrator permissions are required to edit a project.
Activating the Module on a Project
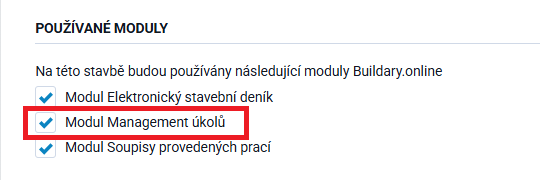
In the project settings (Project Information), the list of modules can be found further down the page, below the map.
By checking the Ticket Management module checkbox and saving the settings using the Save button at the bottom of the page, the module is activated.
The left navigation panel always displays only the modules activated for the given project.
Therefore, if you do not see a module you need to work with, you need to activate it.
The module can be deactivated in the opposite way, by unchecking the box and saving the settings.
There are other areas in the project settings that are related in some way to Ticket Management and should be configured:
Project Team
Project Team Members
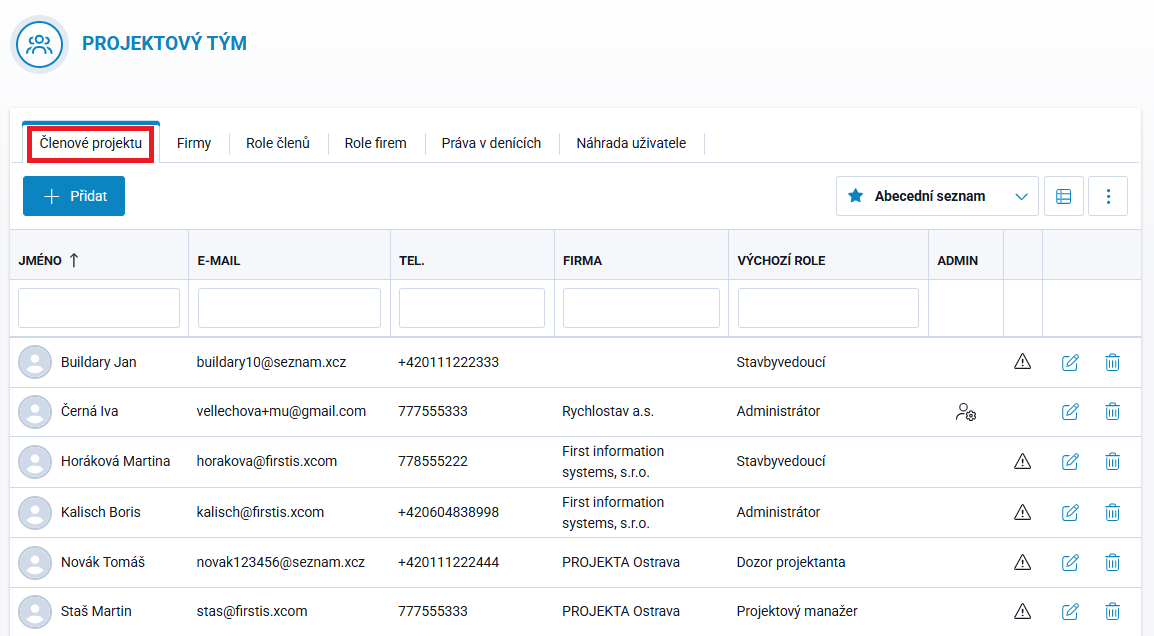
The Project Administrator adds all participants who will be involved in creating, resolving, or approving tickets to the Project Team.
The role assigned to a Project Team Member determines what permissions the user will have across all modules in use.
In the existing Project Team Member list, you can open a member's editing form using the edit icon at the end of the row and modify their details.
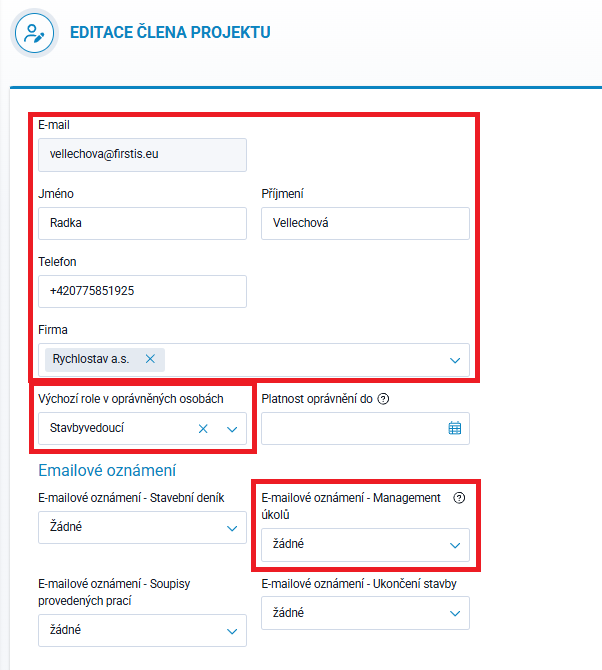
The Project Team Member is added by the Project Administrator by entering their email address. If the user's data has already been entered into the system, the other user details (first name, last name, and phone number) are filled in automatically according to their profile. Otherwise, the administrator enters them manually. The member is then assigned to the relevant company, if their organization is already in the list. If it is not, the administrator adds the organization in the adjacent Companies tab and then assigns it to the user.
The form also contains 2 additional fields related to the Ticket Management module:
Default Role in Authorized Persons → by selecting a role, the administrator determines the permissions the user will have. These are preset according to standard practices, but the administrator can individually adjust the permissions for each role according to their specific needs (see below).

Email Notification - Ticket Management → allows you to select the appropriate notification method for a user regarding a ticket for which they are an assignee or approver:
- None ⇒ the user will not receive any notifications
- HTML Email ⇒ when a ticket is created, the user will receive an email notification about the ticket
- Email with Event ⇒ when a ticket is created, an email notification will be sent and an event will also be added to the calendar, on the planned due date. Updates will also be sent when the ticket is changed or deleted
- Summary Email ⇒ a summary message containing all new or updated tickets for the entire day will be sent. These emails are automatically sent every night.
Member Roles
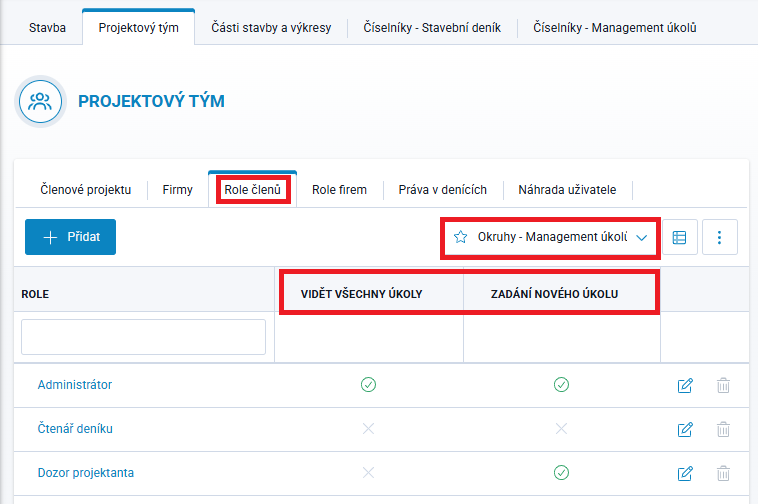
The Member Roles tab contains a list of roles with preset permissions for all modules. User permissions for the Ticket Management module form a very simple system. Only two parameters are monitored, namely who can:
- VIEW ALL TICKETS ⇒ a user with this permission can see all tickets, including those with which they have no relationship. If this permission is not enabled, the user can only see tickets for which they are the author, assignee, or approver
- CREATE NEW TICKETS ⇒ a user with this permission can create a new ticket. If this permission is not enabled, the user cannot create a new ticket, but can edit tickets they are assigned to resolve or approve.